FORS2 PMOS p2 tutorial
This tutorial provides a step-by-step example of the preparation of an OB with FORS2, the Focal Reducer/Low Dispersion Spectrograph at the VLT on Cerro Paranal. Starting with P102, observing preparation for all telescopes on Paranal, including the VLTI, will use the new p2 web interface. Please see http://www.eso.org/sci/observing/phase2/p2intro.FORS2.html for more information on how to use p2.
Goal of this tutorial
In this tutorial you will prepare one OB aimed at observing a bright target to derive the Stokes Q and U parameters across the spectrum. Bright target here means that no blind offset from a reference is needed.
The sample OBs will illustrate the use of a variety of general features of p2 and the kind of decisions you need to take while preparing an observing run, as well as some aspects that are specific to the preparation of OBs for FORS.
1- Getting started
The Phase 2 process begins when you receive an e-mail message from the ESO Observing Programmes Office communicating to you that the allocation of time for the coming period has been finalised and that the results can be consulted by logging into your ESO User Portal account. We hope you got the observing time you asked for, and so we ask you to have the following documentation ready:
- The FORS User Manual Package, especially Section 2.5
- The FORS2 Template Manual
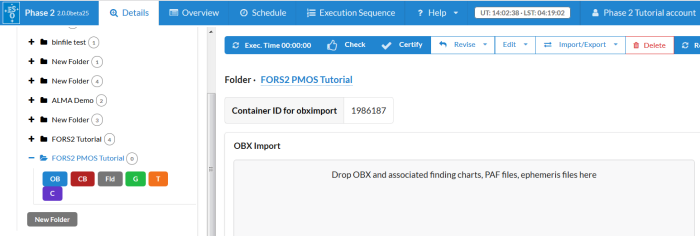
This tutorial was created using the p2demo account at http://www.eso.org/p2demo. You will be asked to login to your ESO User Portal account before being able to use p2.
Runs for a number of instruments appear in the folders area on the left since the same tutorial account is used for all of them. As shown above, select the folder corresponding to the FORS2 Tutorial run, 60.A-9252(F) and click the "+" sign in front of it.
When you select a tutorial run and click the "+" sign, a number of folder may appear created by other users. To create new OBs, you need to create a new folder first and open it just like you see in the screenshot below. To change the name of the folder, click the name in the window on the right.
2- Creating the first OB
The colored buttons under the folder name allow you to create a new OB, calibration block, folder, group-, time link-, and concatenation containers, in this order. Clicking the button for a new OB, the following window appears. By clicking the name of the OB in the window on the right we have already changed it to "Bright star PMOS linear", the target we will observe.
We first select the "Target" tab, and we use the new target name resolving option (supported by Simbad) to retrieve coordinates and proper motion data by using the proper name "UX Ari". Please note: you must remove the spaces from the target name after resolving with Simbad!

Click on the Edit Observing Block icon. The View OB window appears.
This is the window where you will define the contents of your OB.
Entering the target information
The Target Package, where the target information can be entered, is accessed by clicking on the Target icon at the top of the window:
- In the Name field under the Target tab at the bottom, type the target name (Bright star PMOS linear).
- You will now enter the coordinates of the target.
- You should also enter the Class to which the target belongs, for archival purposes. Left-click in the field and use the pull-down menu to select (in this case) Star.
Setting the constraint set
As stated in Section 1, we assume for the purposes of this tutorial that the program has been allocated time in Service Mode. Thus, you need to specify a constraint set for your OBs. You can do this by clicking on the Constraint Set icon next to the Target and filling the entries you find there.
Note that in your Phase 1 proposal you already specified some of these constraints (lunar illumination, seeing, transparency). You must make sure that none of the constraints specified at Phase 2 are more stringent than the corresponding ones specified at Phase 1.
Setting the time intervals
If appropriate, you can specify time windows where your OB can be executed by clicking on the Time Constraints icon. Click on the check-box at the far right next to the first row of the time interval to activate it.
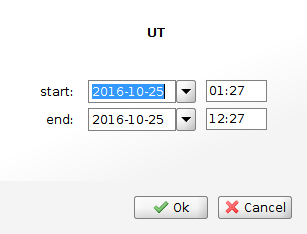
If your observation can be executed in other, non-contiguous time windows, you could define additional time intervals in the same way as described.
Defining the acquisition template
The first template in any science OB is the acquisition template. To define your acquisition template click Template Type"acquisition'' in the upper part of the OB window to highlight it. This will list all the acquisition templates available for FORS in the Template section below it.
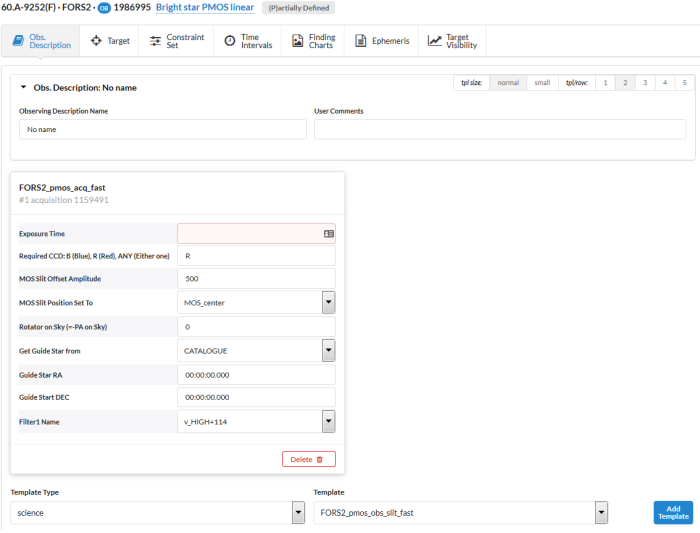
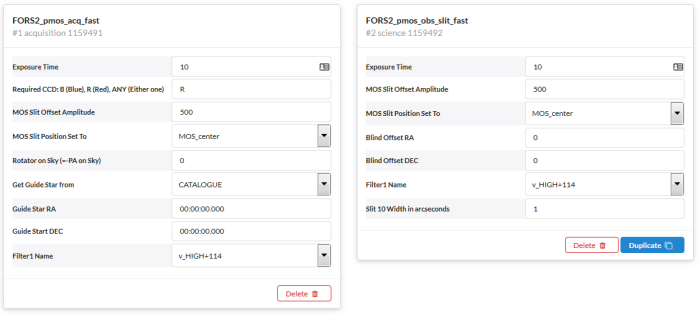
After reading the description of the templates in the FORS User Manual, you decided that the FORS2_pmos_acq_fast template is what you need to use for PMOS (non-FIMS based) acquisition. Click on this template in the Template list, and then on the Add button to the upper right. The keywords for the template will appear in the left middle section of the window, their current values to in the right middle section:
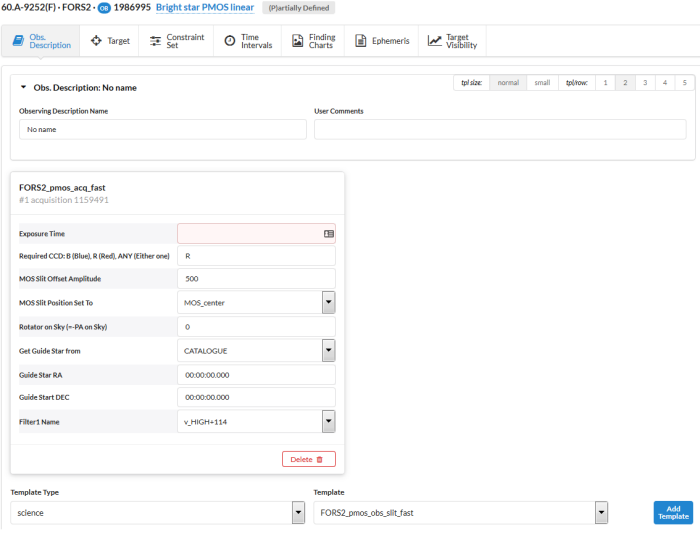
The functionality of this template is multiple. In parallel it will cause the presetting of the telescope to the coordinates in the Target Package, insertion of a filter into the light path, and the rotation of the rotater to the requested angle. After telescope preset the guide probe will move to a guide star it has picked from its internal catalogue and the main mirror will activate its reconfiguring. After two full loops of the active mirror an acquisition image will be obtained with the exposure time as defined in the first line of the template.
To enter values into the template, left-click on the entries in the right hand column. For entries written in BLACK there are default values, which are legal. The entries written in RED cannot be defaulted and must be filled in by you.
As of P98, the choice of CCD should be ANY if your science benefits from good blue sensitivity. Even though the E2V detector is available only in visitor mode, some service mode nights (those immediately before VM runs) might make use of the E2V in which case your choice of ANY indicates that your OB is suitable for such nights. If your requirements apply to the red part of the spectrum, you should choose R for the CCD.
Your target is very bright, and after consultation with the FORS ETC you find that with an exposure time of 10 seconds you will obtain a S/N above 10 which is good enough for centering, and the object will not saturate. The latter condition is also very important for the centering, and determination of the correct exposure time to meet those two conditions is the responsibility of the user, i.e. you. You click in the field and enter "10''.
Let's assume your target star has a companion at PA (east of north) of 68 deg which you also want to fall into the slit. You must then enter -68 for the rotater angle (which is minus the PA). You now click in that field and enter -68. You want the standard resolution collimator so the next 6 fields can be left with the default values.
You now click on the filter field which will produce a pull-down menu. Click on the v_HIGH+114 filter here because that was the filter you used to calculate the correct exposure time with the FORS ETC.
Finally you click on the slit field and select the 1.0 arcsec slit.The different slits are not only of different width, but they also have different positions in the focal plane. Therefore, you MUST here choose the same slit that you will later use for your science observations.
Placing your target on the slit
For imaging the field acquisition is simply to point the telescope. In the case of spectroscopy such as PMOS, however, it is a three-step process. The first step (to point the telescope and start guiding and active mirror) has now been accomplished. An acquisition image of the field has been taken, and the target will now be at the correct position to within 0.25 arcsecond. You have clearly marked the target, and the PA of your slit on the Finding Chart (FC) you have submitted, so the observer will now check on the acq image that the field rotation is indeed what you intended. The observer will also identify your target, and start the procedure which will move it to the exact position on the slit. To verify that this has been done successfully you will now obtain another image, but this time with the slit in place.
First click on Template Type ``science'' in the upper part of the OB window to highlight it. Then click the Template ``FORS2_pmos_obs_slit_fast'' and the Add button.
You will now enter the same exposure time as before, the same filter, and the same slit. The telescope has moved slightly since the first image, and in this second image the observer should be able to see the object precisely centred on the slit.
Defining the Observation Description
Once the target is acquired, the science observations begin. They are defined in a set of one or more templates that form the Observation Description (OD). For most observing modes there is a clear cut between the acquisition templates and the science templates, but for technical reasons the mandatory "Through-slit image'', which is taken as part of the acquisition, is formally a science template and therefore part of the OD.
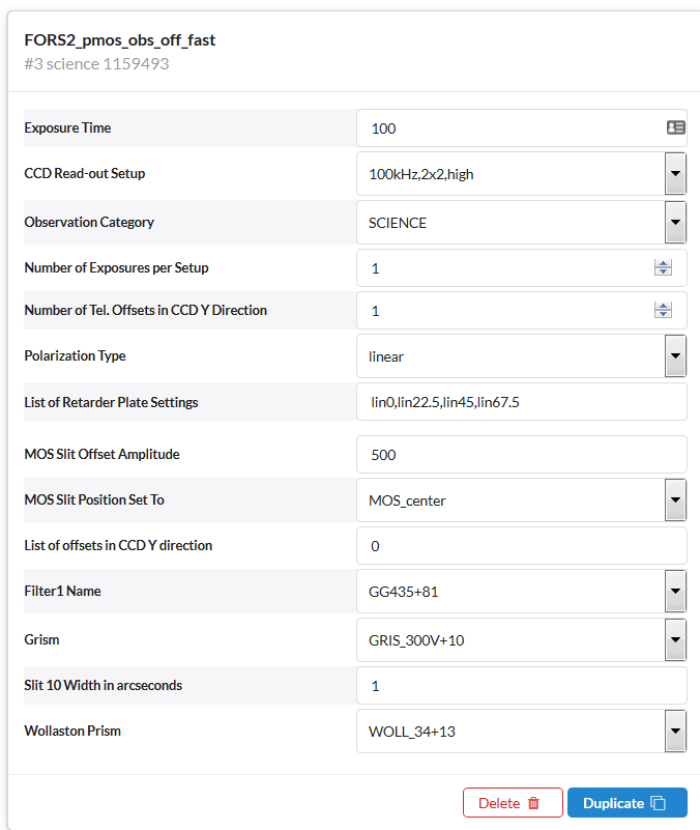
You will now add a "real'' science exposure by clicking on the Template "FORS2_pmos_obs_off_fast'' and the Add button.
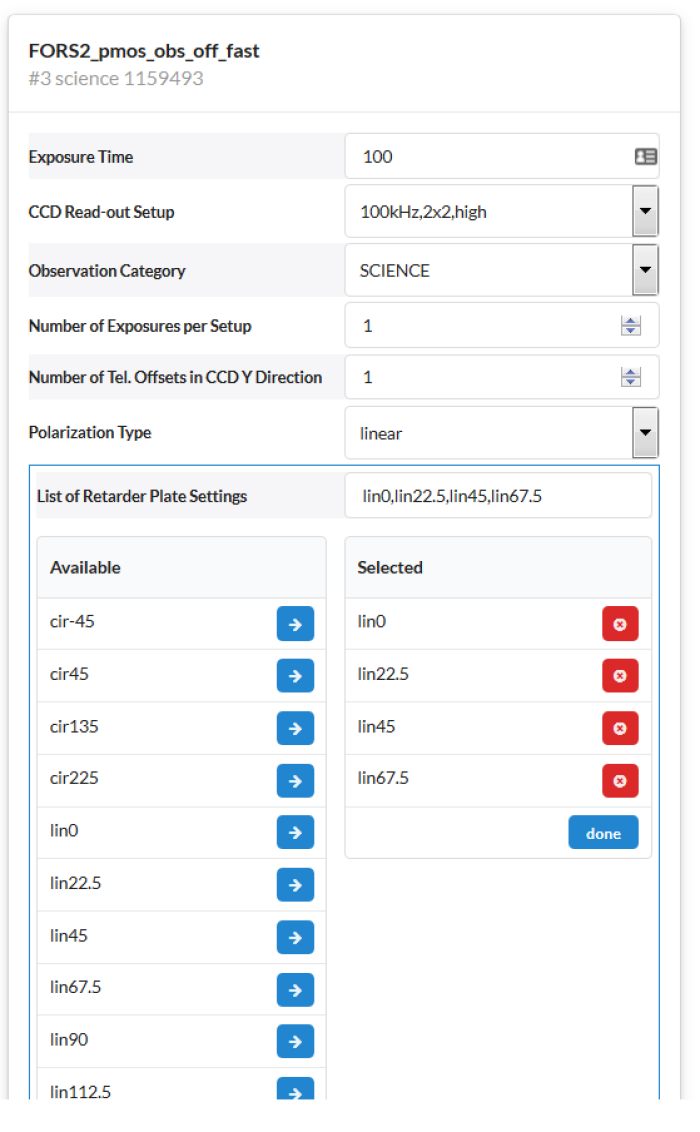
The slit must be the must be the same as in the acq template, and you have decided that the resolution provided by the 300V+10 grism is adequate.The blue part of the spectrum is not important for you, but you need the red part out to 865 nm. After careful inspection of the grism table in the FORS manual, you find that if you use the order separation filter GG435+31 you will get exactly the part of the spectrum you need. Please keep in mind that not all grisms (e.g. GRIS_600RI+19) can be used for PMOS as the Wollaston prism may be mounted on the same wheel as the grism, even if the ETC does compute SNR spectra for such a combination. Also, in our example, we choose 30s for the exposure time not to saturate the detector on this bright target (after consulting the ETC).
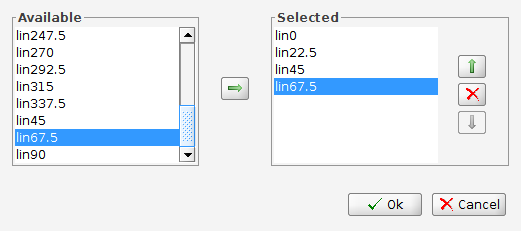
Finally, you need to enter retarter plate angles which are needed to compute the Stokes parameters from the fluxes of the two polarized beams of the Wollaston at the different angles. For linear polarization measurements, the FORS2 user manual (sections 2.5.1 and 2.5.2) recommends 0 deg, 22.5 deg, 45 deg, and 67.5 deg. These are selected one after the other from the window shown below (which you get when clicking on the retarder angle field). Please note that simply repeating the four retarder angles (setting the number of exposures higher than 1) would only decrease the noise, but not systematic errors. It is therefore recommended to use the retarder angles from Table 2.6 of the user manual, either the first 4, 8, or all 16 angles (the pipeline does not reduce 12 angles properly).
You may have noticed that there is an entry "ExecutionTime" in the upper part of the window. When you enter 30 seconds for the Exposure Time and press the Recalculate button, that Execution Time becomes 18 minutes, 29 seconds.
It may be useful in many cases to have an easy way of identifying an OD, like when having observations of a number of targets performed with identical instrument configuration and exposure times. The OD Name field in the View OB window allows you to define names for the ODs. In this example, we assign to the OD the name 300V + GG435+31. The OD name also appears in the P2PP main GUI, thus allowing the identification at a glance of all OBs having ODs with the same name.
Adding more science templates
In principle you could now add another science template where you could obtain spectra of the same object with another grism. This option is only relevant for very bright objects or for imaging mode. You may add any number of templates if you wish, as long as the OB Execution time stays below 1 hour. There are two ways of adding a new template. You can either click Add or duplicate the one you have already completed. Highlight the last template you added by clicking on the column with the parameter labels. Then click the Duplicate button to the right of the template list window. In this case, the values of the keywords in the newly added template will have the same values as in the one they were copied from, which is very convenient if you just want to edit a few of them. To delete a template from the observation description, highlight it as before, but click the Delete button.
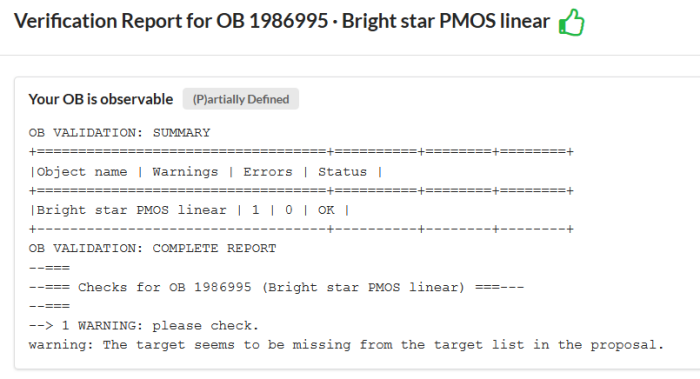
It is recommended to check the OB definition using the "Check" button on the taskbar near the top of p2. If everything is OK, you should see a report like shown below. Errors have to be corrected unless a waiver has been approved by USD for the specific conditions, while warnings are displayed to make sure you did not overlook a specific mistake commonly made.
Instrument selector
3: Additional OBs
By repeating the steps described above you can create all the OBs you need for your run. In particular, the Duplicate button in the P2PP main GUI duplicates an entire OB. This is a convenient and easy way to make new OBs from existing ones by editing just a few parameters.
4: Certification and notification
The completed concatenation is already in the ESO data base thanks to the p2 web data base interface, but it has to be certified before being ready for execution. Please follow the instructions given at http://www.eso.org/sci/observing/phase2/p2intro/p2Features.FORS2.html for information on how to prepare the Readme, certify the OBs, and notify ESO of the OBs beaing ready for review by your support astronomer.
