4.4.6. RAD Tutorial Second Part
You can see the final product of this section of the workshop in the CUT repository. Please download it from:
From GIT repository |
From Webpage |
|---|---|
|
|
mv cut/examples/rad_hello_custom ./
rm -rf cut
You can run it by building it and installing:
cd cut
waf configure build install
cut_rad_hello_custom
As the previous example, you can start the hellocii before, or by using the Top Menu Entry , and then .
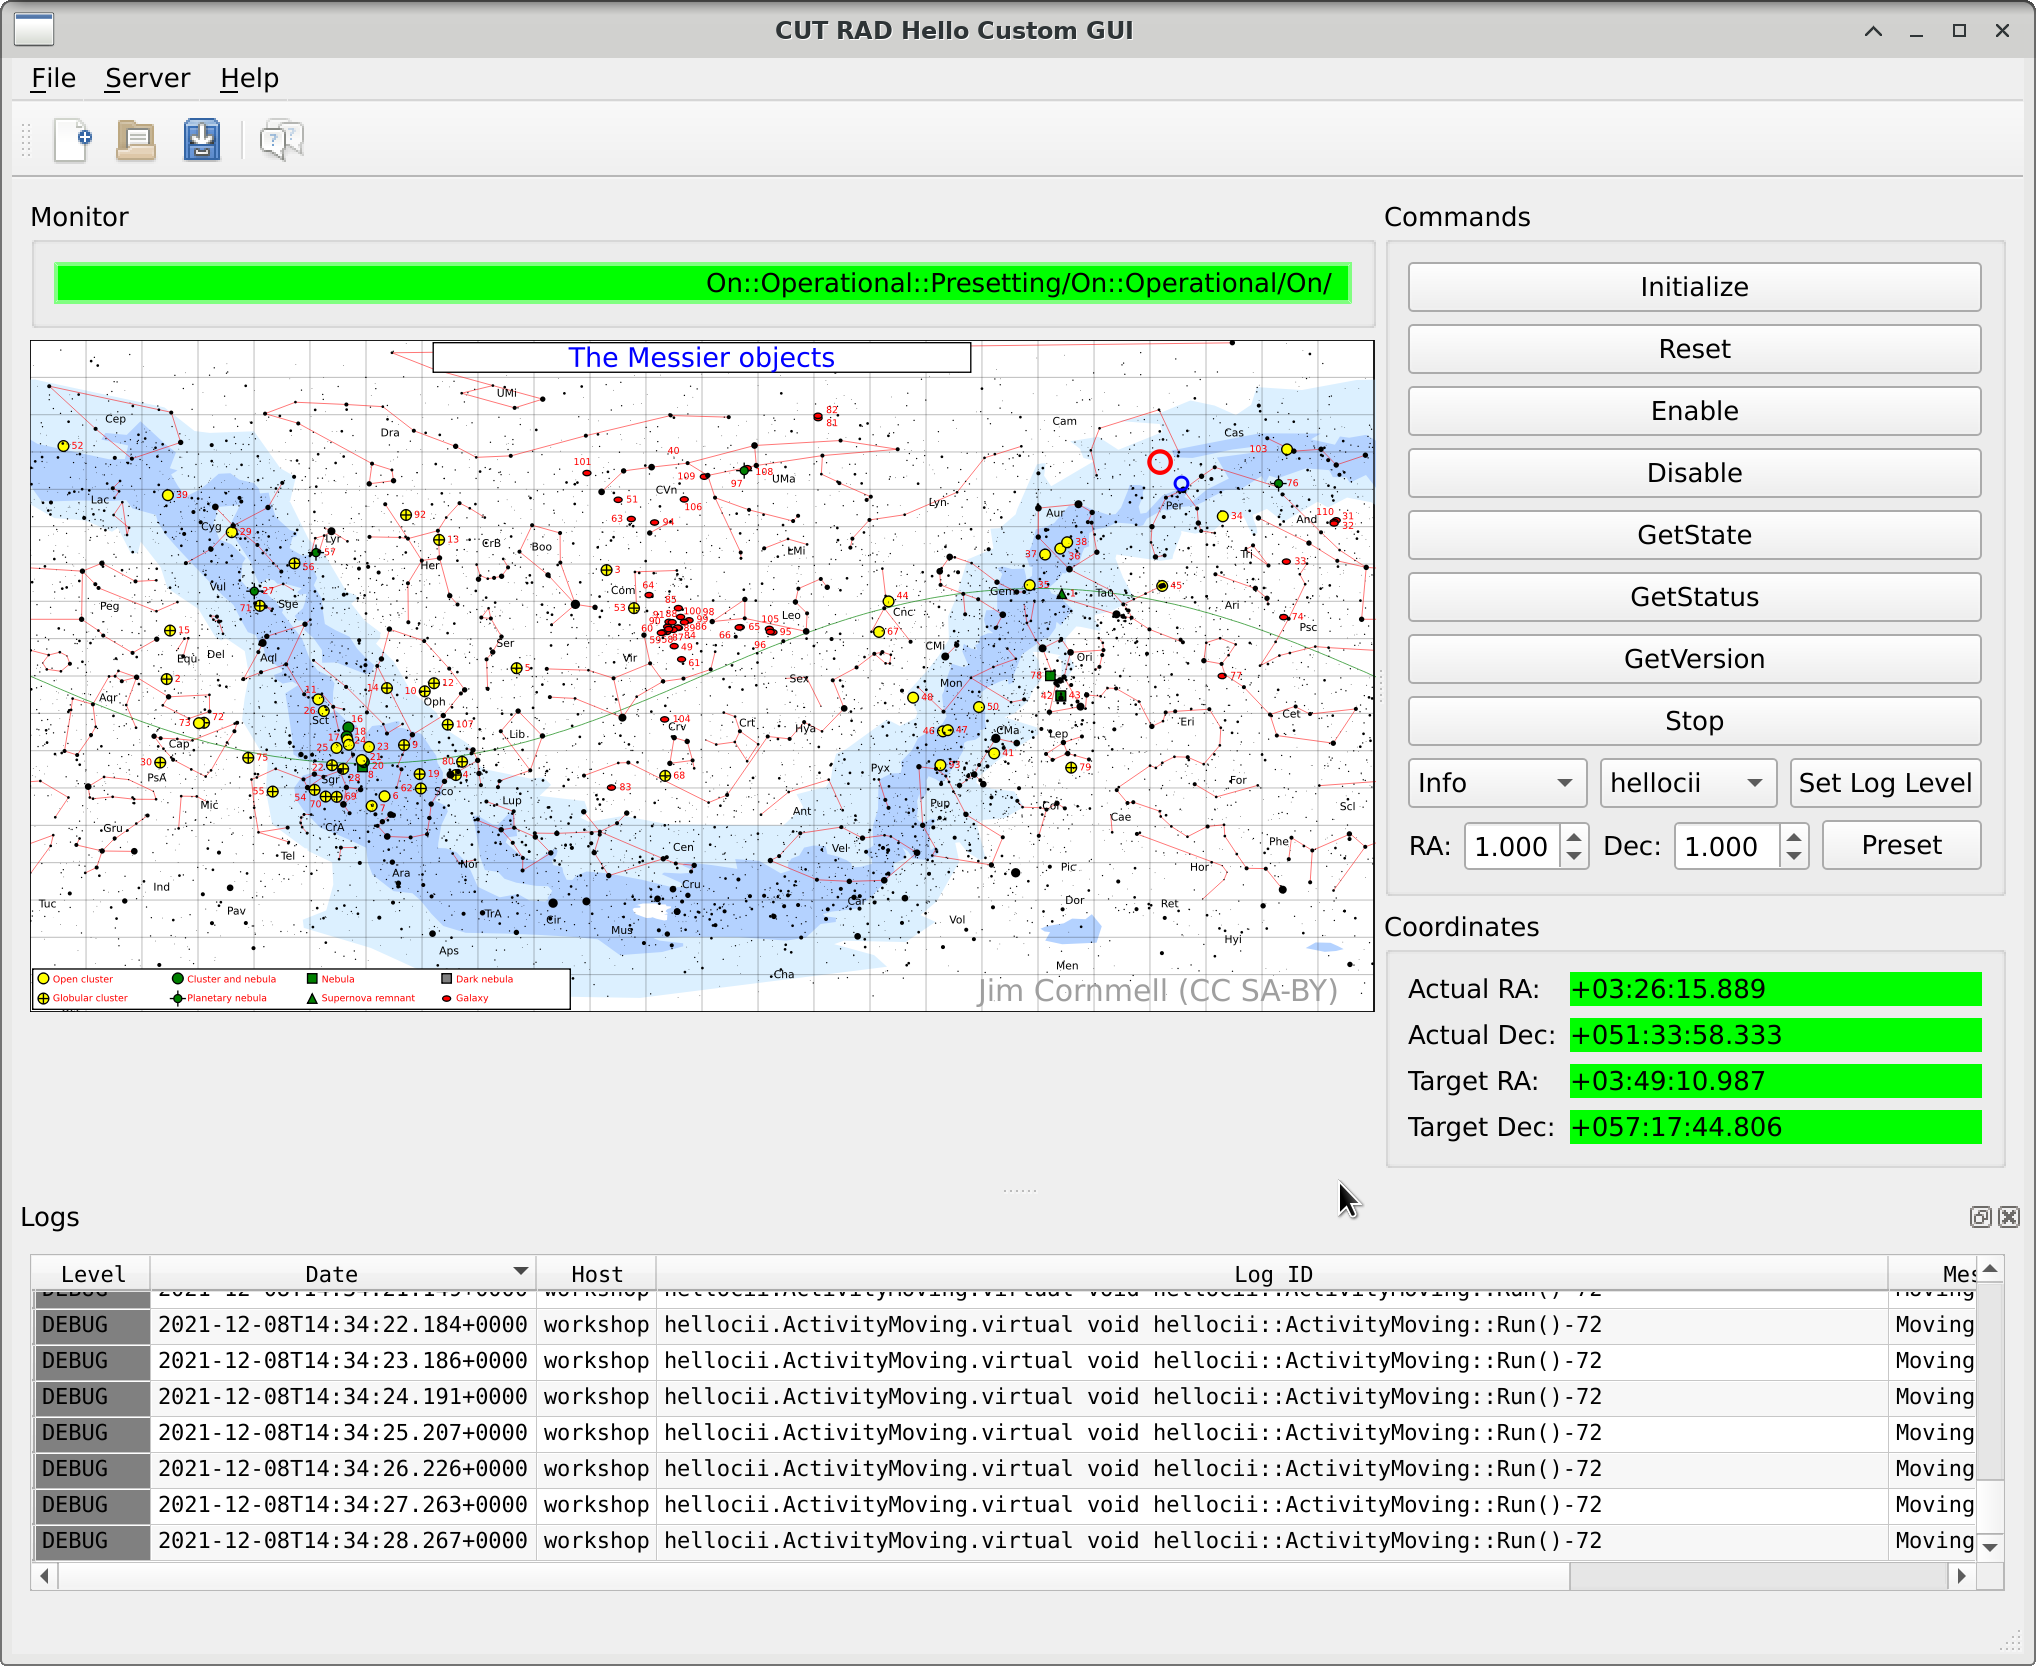
CUT RAD Hello Custom GUI - Final product of this section of the tutorial.
The second RAD tutorial adds the Preset command that executes an Activity:
The
Presetcommand itself accepts aTelPositionstructure as argument (which has two members: ra and
dec). * The Activity publishes four OLDB data points: a pair of numbers that represent the Actual coordinates of a Telescope and a pair that represents the Target coordinates.
To allow the user access to the Preset Command and the OLDB Data points, we will introduce the following modifications:
Four new QLabel and two TaurusDmsLabel and TaurusHmsLabel to present the OLDB data points.
For the Preset command, we will add two QDoubleSpinBox to enter the coordinates, two QLabel to indicate which coordinate (ra/dec), and a QPushButton to trigger the command.
4.4.6.1. OLDB Data Points (cut_rad_hello_custom/src/cut_rad_hello_custom/mainwindow.ui)
This section is purely declarative (no code) and here is where we can see Qt and Taurus in action through declarative databinding.
We will delete the existing Form Layout that contains the Coordinates. We will not use those widgets. Instead we will use TaurusDmsLabel and TaurusHmsLabel to preset radians as HMS and DMS angle notation.
Set a Form Layout for the Coordinates Group Box. Next, please drag 8 Labels into the Group Box that was just created. You should end up with a 2x4 layout of Labels.
Name the first column of Labels:
Actual RA:
Actual Dec:
Target RA:
Target Dec:
We will use Widget Promotion to transform the second column of widgets. We will start with the QLabel widget right of Actual RA Label. Right click on the QLabeL, and from the context menu select the
Promote to… entry. You will see a Dialog like this one:
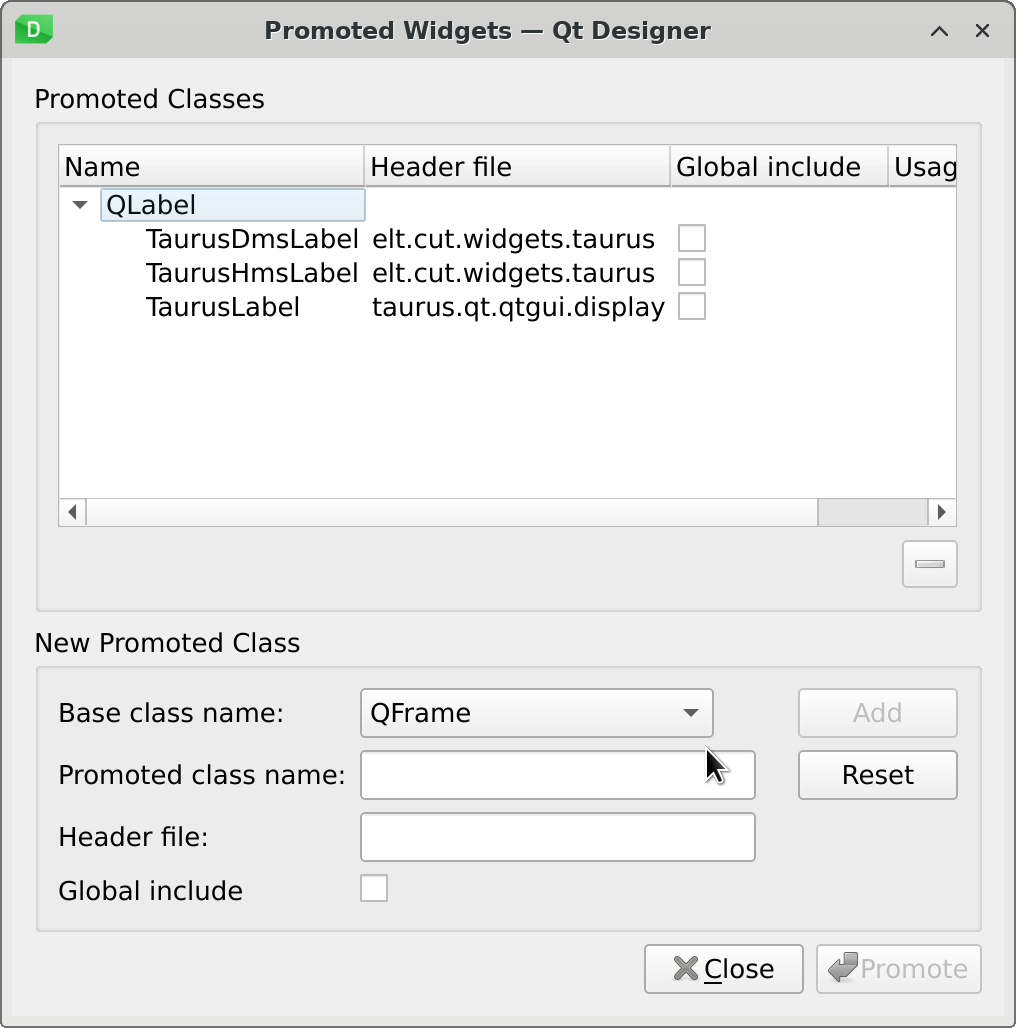
Promoted Widgets Dialog
Enter these values:
Base class name: QLabel
Promoted class name: TaurusHmsLabel
Header file: elt.cut.widgets.taurus
Click on the Add Button. Select the new entry for TaurusHmsLabel, and click on the button Promote Button.
Once a new widget is defined, it is save for future use within the mainwindow.ui file. So promote now the
Label right to the Target RA: Label. You can right click on the Label, and click on the
Promote to > menu entry. Please note that this is a different menu entry from Promote to….
There you can select the TaurusHmsLabel entry.
We will repeat the process above for TaurusDmsLabel on the two other Labels. The entries for the new widgets in the Promoted Widgets Dialog are:
Base class name: QLabel
Promoted class name: TaurusDmsLabel
Header file: elt.cut.widgets.taurus
Now, lets add dynamic properties using the Property Editor Dock Widget. Click on the first TaurusHmsLabel widget, and using the Property Editor Dock Widget, click on the Plus Button. Select string, and name it model.
The values for the model properties are in order:
cii.oldb:///elt/hellocii/mon/actual/ra
cii.oldb:///elt/hellocii/mon/actual/dec
cii.oldb:///elt/hellocii/mon/target/ra
cii.oldb:///elt/hellocii/mon/target/dec
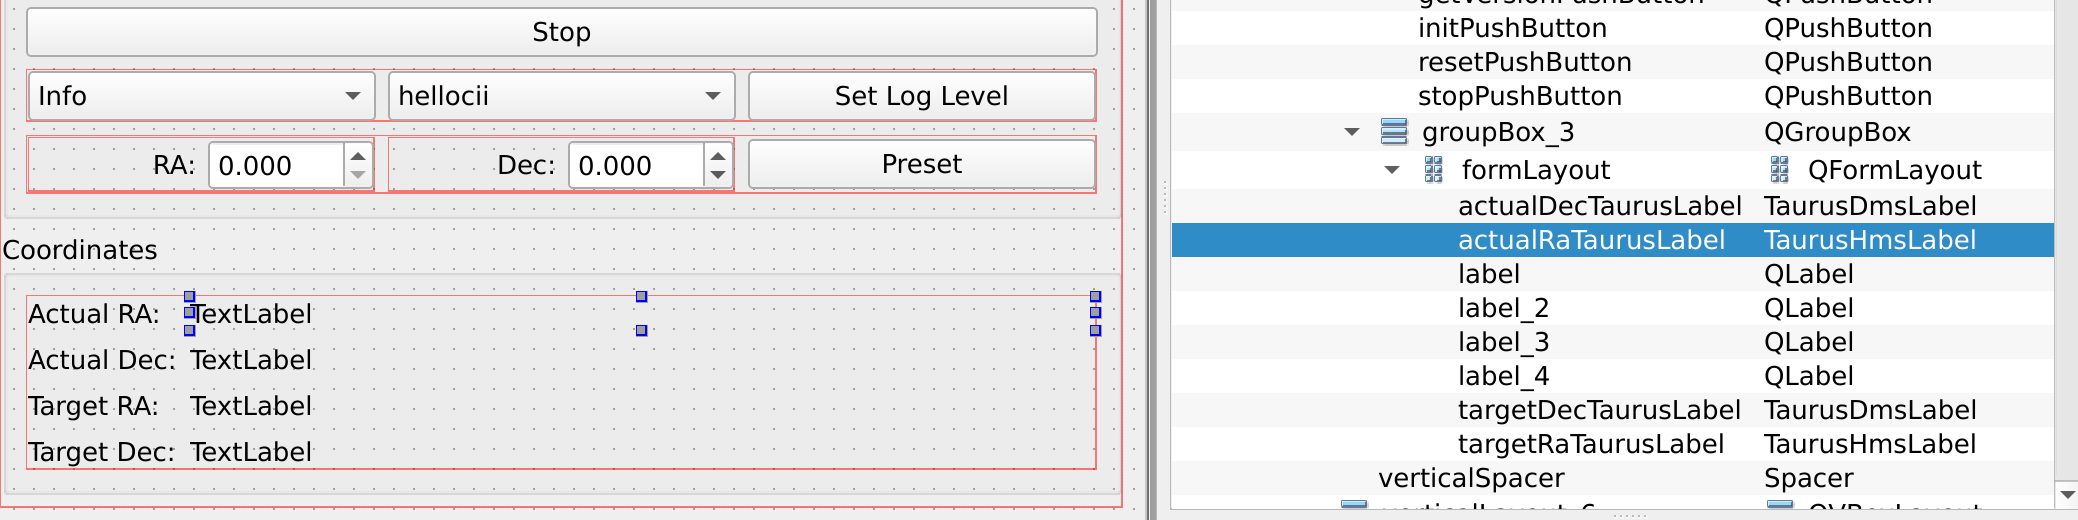
Coordinates Group Box
4.4.6.1.1. OLDB Data Points in QeDartBoard
At this point, we can execute the application and we will see that the application will present the OLDB values. But we can do better: we can propagate these values to the QeDartBoard.
We will use Qt Designer to connect the TaurusHmsLabel and TaurusDmsLabel Signals to the QeDartBoard Slots.
Click on the Edit Signal/Slot Toolbar Button, or press F4. This will change the behavior of the Qt Designer. At this point, we cannot add nor remove widgets, we can only lay connections between widgets. We start a Drag operation in the first TaurusHmsLabel and drop it on the QeDartBoard.
This will open a new Configure Connection Dialog, were we can select a pair of Signal (from the TaurusHmsLabel), and a Slot (from QeDartBoard).
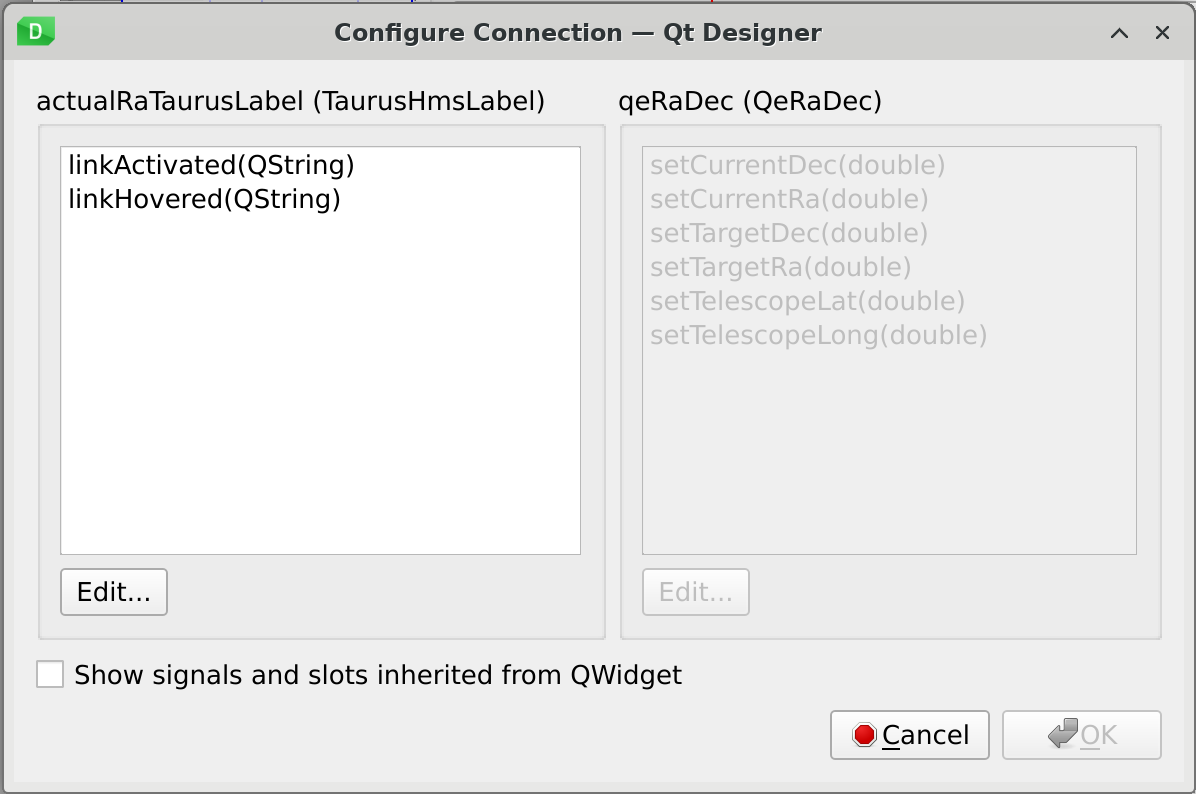
Configure Connection Dialog: Here we click on the Edit… button on the left.
Click on the Edit… Button on the left side of the Configure Connection Dialog. A new Dialog will open, called Signals/Slots for TaurusHmsLabel, and it contains the the list of Signals and Slots that the TaurusHmsLabel widgets offers. We have added manually the widget, and because of this, Qt Designer does not know its extras signals. We will add only one signal, and for that click on the bottom Plus Button. A new entry is created. Type radiansChanged(double). Click on the OK button, which will close the Dialog.
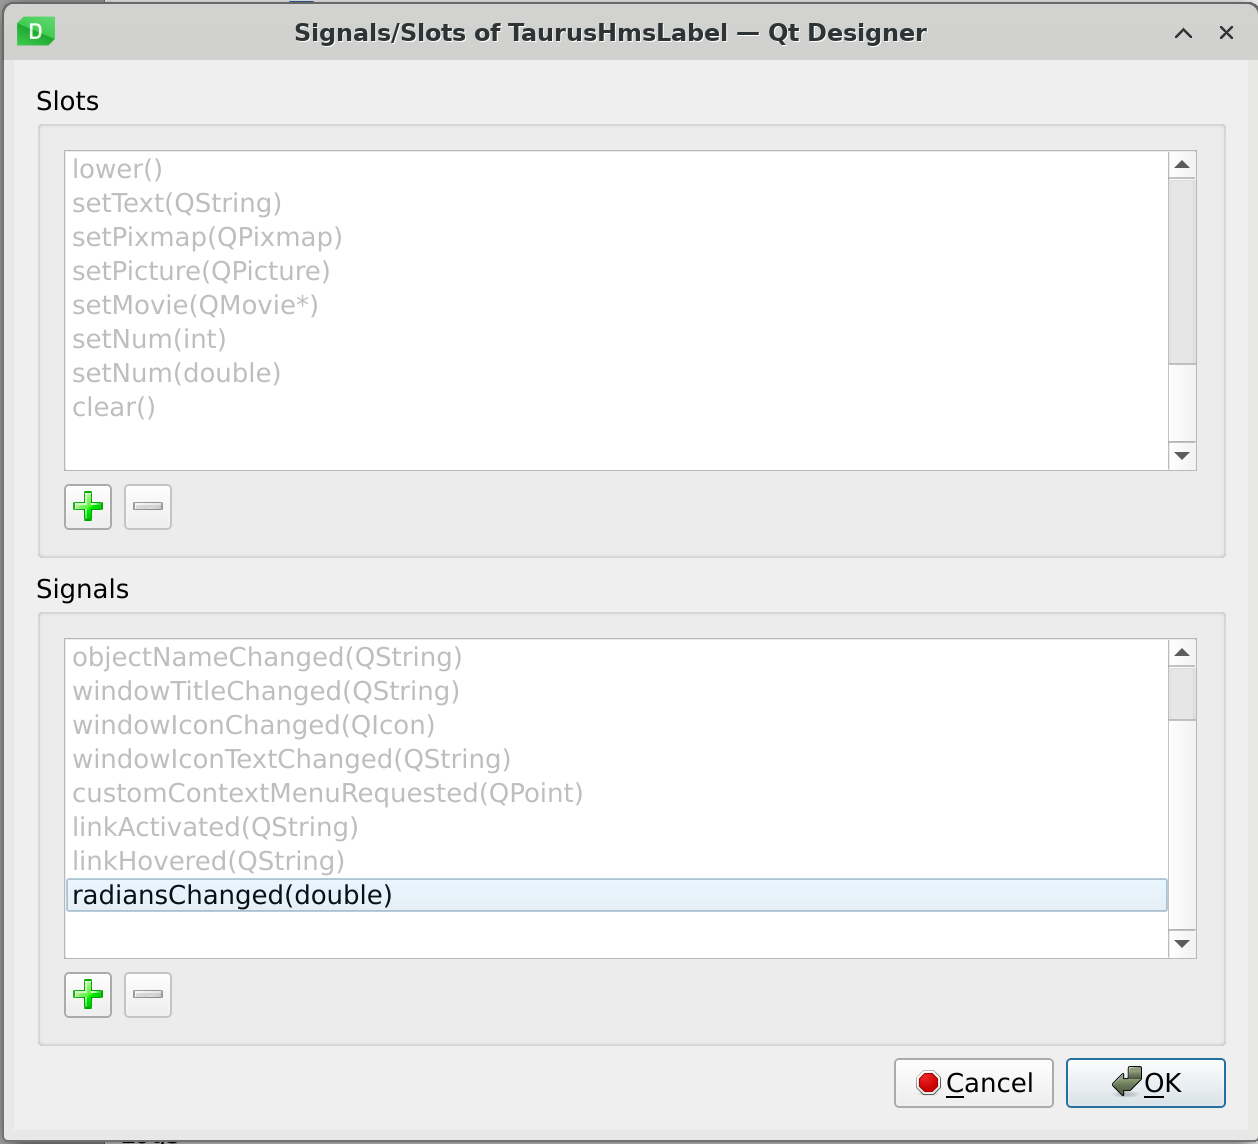
Configure Connection Dialog: Here we add the signal provided by TaurusHmsLabel
At this point you can select the radiansChanged(double) Signal, and once it is selected, the Dialog will show us the entries that match the signature. Select the Slot setCurrentAlt(double).
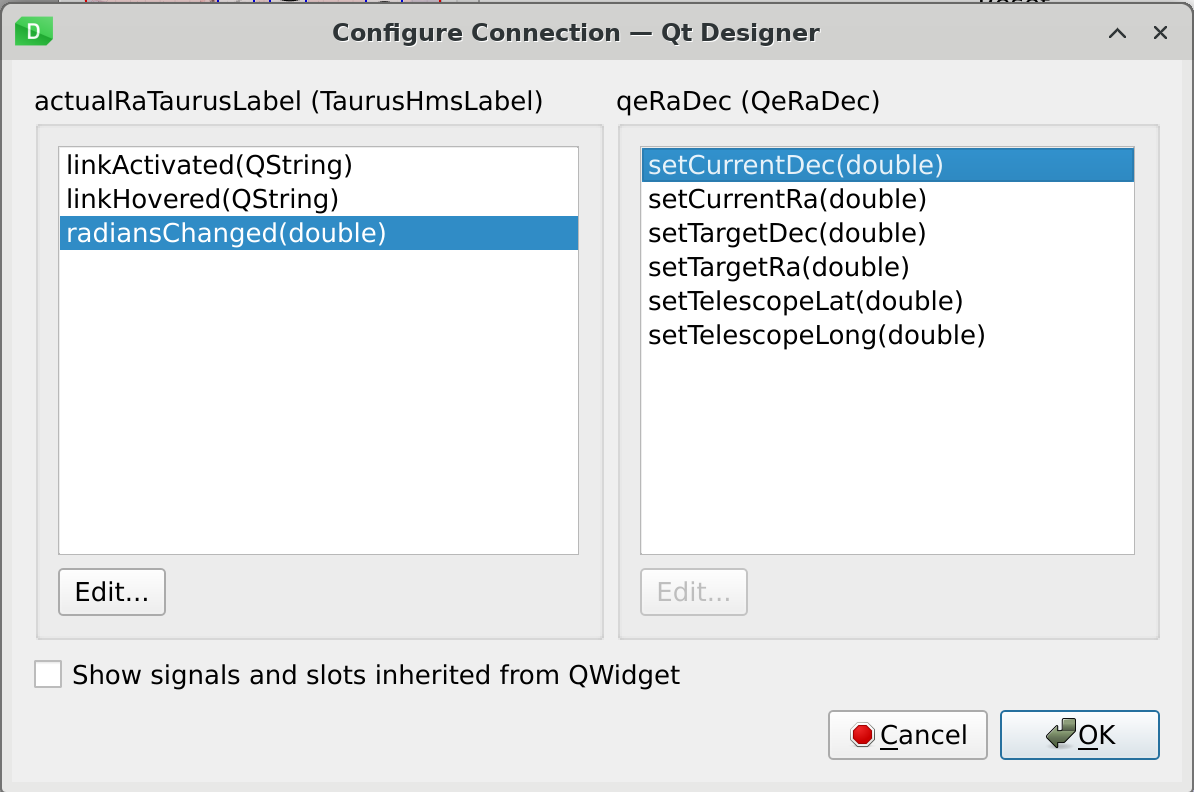
Configure Connection Dialog: We now select radiansChanged(double) as Signal and setCurrentAlt(double) as Slot.
We repeat the same procedure for the next three widgets.
Current RA: setCurrentAlt(double) – Already done
Current Dec: setCurrentAz(double)
Target RA: setTargetAlt(double)
Target Dec: setTargetAz(double)
Now, every time a new value is displayed in the TaurusHmsLabel or TaurusDmsLabel widgets, the same coordinate is updated in the QeDartBoard.
Press F3 or click on the Edit Widgets Toolbar Button to return to the normal view.
4.4.6.2. Preset Command
The Preset Command works very similar to the SetLogLevel Command. We will need to add the necessary widgets to
the UI, a method that handles the click in the button, and a method that manager triggers the call in the server
application.
4.4.6.2.1. Modifications to (cut_rad_hello_custom/src/cut_rad_hello_custom/mainwindow.ui)
Drag a new Horizontal Layout from the Widget Toolbox to the :Commands Group Box below all the other buttons. The reader will notice that this layout appear as a thin red line. Dropping new widget in it requires very fine precision with the mouse, or to use the Object Inspector.
We will do a bit more complex layout this time:
+-------------------------  Horizontal Layout ----------------------------------+
|   +----Horizontal Layout----+   +----Horizontal Layout----+                   |
|   | Label   raDoubleSpinBox |   | Label  decDoubleSpinBox |  presetPushButton |
|   +-------------------------+   +-------------------------+                   |
+-------------------------------------------------------------------------------+
Is a double nested Horizontal Layout. This will allow us to match the layout from the SetLogLevel command, and
have the widgets needed to collect the arguments for the Preset Command. Try and replicate this on your own. Remember to
use the Object Inspector Dock Widget to place the widgets and layouts. This will make you life much more
easier.
Set the stretch factor of the first Horizontal Layout to 1,1,1.
Right the alignment > Horizontal property of the Two Labels to Right. This will create a bit of spacing, while putting the Label closer to the Double Spin Box it represents.
Remember to set the objectNames of the QDoubleSpinBox widgets and the QPushButton widget. We will use these in the implementation.

Preset Layout and its Object Inspector view
4.4.6.2.2. Modifications to UI Implementation (cut_rad_hello_custom/src/cut_rad_hello_custom/applicationwindow.py)
The applicationwindow.py file needs to include one more method. This is a Slot that through auto-connection
takes cares of calling the preset() method in the server_facade object.
We can see that in the name of the Slot defined in line 3, we refer to the presetPushButton object, which
hold the actual widget we have defined in the mainwindow.ui designer UI file. It reacts to the clicked
Signal.
Just as the ICD method SetLogLevel, Preset also uses two members to fill a structure. This file
applicationwindow.py concerns itself only with presentation and interaction, so we only pass the values
captured form the user by the UI to the server_facade.preset() method.
To get the values from the raDoubleSpinBox and decDoubleSpinBox widgets, we use the provided method
value().
 1@TraceIt()
 2@Slot()
 3def on_presetPushButton_clicked(self):
 4    '''
 5    Slot that auto-connects to the QPushButton presetPushButton.
 6    presetPushButton is not declared in the code, but in the mainwindow.ui.
 7    See: https://doc.qt.io/qt-5/designer-using-a-ui-file.html#widgets-and-dialogs-with-auto-connect
 8    '''
 9    self.server_facade.preset(
10        self.ui.raDoubleSpinBox.value(),
11        self.ui.decDoubleSpinBox.value(),
12        result_slot=lambda x: self.info("Return: {}".format(x)))
13    pass
4.4.6.2.3. Modifications to Server Class (cut_rad_hello_custom/src/cut_rad_hello_custom/stdcmdsfacade.py)
We need to add the method listed below to the stdcmdsfacade.py file. This creates in line 29 a new Structure
using the mal object from its MalAdapter parent class. Then, it takes the arguments ra and dec
and sets them to the TelPosition Structure.
After this, the call procedes just as usual.
 1@Slot(float, float)
 2def preset(self, ra: float, dec: float, result_slot=None, error_slot=None):
 3    '''
 4    This method executes the Preset command on the server.
 5    It uses the Asynchronous interface.
 6    It will wait or the future object to has its result, and then
 7    it will call the slot function with the result as argument.
 8
 9    Parameters
10    -----------
11    ra: float
12        Right Ascension value in radians.
13    dec: float
14        Declination value in radians.
15    result_slot: QtCore.QSlot
16        Slot method that will be triggered when the result is available.
17    error_slot: QtCore.QSlot
18        Slot method that will be triggered when an error is detected.
19
20    Return
21    -------
22    None
23
24    '''
25    if(not self.isConnected()):
26        self.error('Application is not connected to Hellocii application. \
27                    Please connect first.')
28        return
29    coordinates = self.get_mal().createDataEntity(TelPosition)
30    coordinates.setRa(ra)
31    coordinates.setDec(dec)
32    task = Task(self.get_interface().Preset, coordinates)
33    if result_slot is not None:
34        task.signals.result.connect(result_slot)
35    if error_slot is not None:
36        task.signals.error.connect(error_slot)
37    task.signals.finished.connect(self.thread_complete)
38    task.start()
At this point, the application is ready to be used.
4.4.6.3. Replace QeDartBoard by QeRaDec (cut_rad_hello_custom/src/cut_rad_hello_custom/mainwindow.ui)
We recommend the reader to replace the QeDartBoard with a QeRaDec as an extra exercise. The change is rather simple. Just click on the QeDartBoard and press Delete. Drag a new QeRaDec to the same position.
We need to remake the connection we establish before, but using slots at widgets that are more appropriate to the coordinates system:
Actual RA: setCurrentRa(double)
Actual Dec: setCurrentDec(double)
Target RA: setTargetRa(double)
Target Dec: setTargetDec(double)
The QeRaDec is a rather simple implementation. It uses a vector-based image (whose author it Jim Cornmell), and a cylindrical projection over the image. The ratio is of the image is 2:1, and uses radians as input, just like the QeDartBoard.