Lehdistötiedote
Working Day and Night at the Paranal Observatory
17. joulukuuta 1998
Much attention has been directed recently towards the spectacular first images obtained with the astronomical instruments now being tested at the first (UT1) of the four 8.2-m VLT Unit Telescopes at the ESO Paranal Observatory. There has indeed been a great interest in the newest, deep VLT views of the near and distant Universe by FORS1 in visual wavebands, as well as the first infrared glimpses into star-forming regions by ISAAC, available at the ESO website in different sizes and resolutions. Many of the original observational data will be placed in the VLT Archive in early 1999 and can then be accessed for scientific studies - an announcement will be made in due time.
At this moment, the FORS1 instrument at UT1 is in the second commissioning phase that will last another ten days.
Important progress is also reported from other work areas at Paranal and the assembly of the other three Unit Telescopes (UT2 - UT4) is proceeding in great strides.
The M1 mirror cell (still with a concrete dummy mirror) has been attached to the mechanical structure of UT2 and the encoders were installed at the elevation axis. This telescope will have "First Light" in late March 1999 when the first images will be obtained with the VLT Test Camera in Cassegrain focus. The mechanical structure of UT3 is being assembled and the heavy centerpiece is now in place. The fourth enclosure is ready and the supporting elements for UT4 have been installed.
In Europe, the third polished 8.2-m Zerodur mirror in its special transport box was loaded onto the vessel Scanscot Oceanic this morning in the harbour of Le Havre (France). Everything went smoothly and it is expected that the ship will arrive in Antofagasta towards the end of January 1999.
Future developments may be followed via the VLT Information webpage.
Recent assembly work
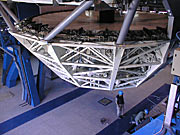
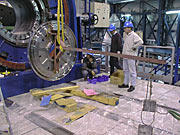
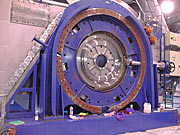
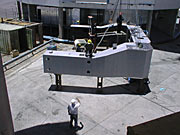
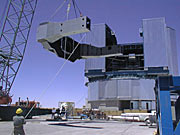
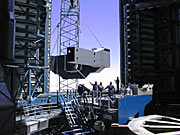
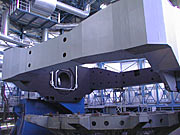
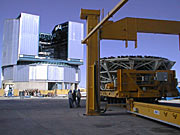
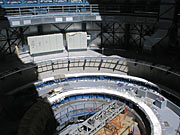
The following "diary" and the associated photos illustrate the progress of the assembly work during the past week.
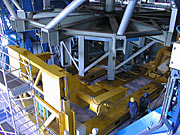
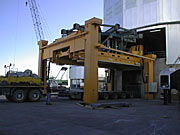
Thursday, December 10, 1998: The large lifting platform is moved from its position outside the UT1 enclosure to outside the UT2 in preparation for the removal of the dummy M1 Cell on UT2. At the same time, the second M1 Cell with a dummy 8.2-m mirror of concrete is prepared for transport and lifted onto its handling tool, down in the Mirror Maintenance Building (MMB) at the basecamp.
Friday, December 11: This work continues with the removal of the dummy M1 Cell from the UT2 structure where it has been used to assemble and test the telescope. The encoder system that reads the positions of the azimuthal (vertical) and elevation (horizontal) axes is put in place. At UT3, the first large part of the heavy "centerpiece" that will later support the telescope tube is installed. With this step, UT3 begins to look like a "real telescope".
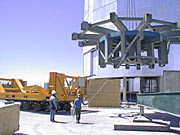
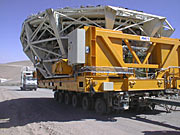
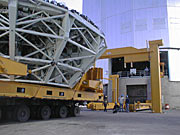
Saturday, December 12: The dummy M1 Cell is lifted from the transport carriage and placed outside the UT4 enclosure. It will later be used on this telescope. The transport carriage is taken down to the basecamp and the second M1 Cell with the concrete mirror is loaded on. The convoy moves back up the mountain to the UT2 enclosure and the M1 Cell is lifted inside. It is elevated towards the back of the lower telescope struts to check the fit.
Sunday, December 13: This day is spent checking and adjusting the fit of the M1 Cell to the back of the UT2 structure. Work continues on the encoder installation.
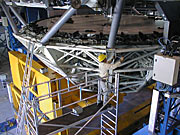
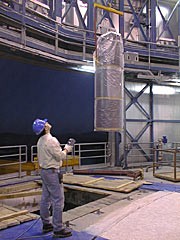
Monday, December 14: Adjustments of the bolted interfaces of the M1 Cell and UT2 continue and the optical alignment is checked. The cell is then lowered and the M3 tower on which the flat, tertiary mirror will be mounted, is installed. At UT3, the second part of the centerpiece is lifted and put in place. This is the most difficult operation during the entire telescope assembly sequence. It involves lowering the second piece of the centerpiece weighing over 50 tonnes into the bearing with a clearance of less than 1 millimetre.
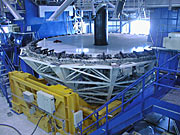
Tuesday, December 15: The M1 Cell is raised again for the last time and bolted to the UT2. The balance of the telescope structure is then checked and adjusted before it is inclined with its M1 Cell in place for the first time. Meanwhile, the encoder reference tape is installed and checked. The measurements show it to be even better than that at UT1.
The following series of electronic photos was obtained during the operations described above. They were made for documentation purposes and have a limited resolution (1024 x 768 pix); some were taken under difficult illumination conditions.
Tiedotteesta
| Tiedote nr.: | eso9862 |
| Legacy ID: | Photo 51a-z/98 |
| Nimi: | Mirror |
| Tyyppi: | Unspecified : Technology : Observatory : Telescope |
| Facility: | Very Large Telescope |
| Instruments: | FORS1, ISAAC |
Our use of Cookies
We use cookies that are essential for accessing our websites and using our services. We also use cookies to analyse, measure and improve our websites’ performance, to enable content sharing via social media and to display media content hosted on third-party platforms.
ESO Cookies Policy
The European Organisation for Astronomical Research in the Southern Hemisphere (ESO) is the pre-eminent intergovernmental science and technology organisation in astronomy. It carries out an ambitious programme focused on the design, construction and operation of powerful ground-based observing facilities for astronomy.
This Cookies Policy is intended to provide clarity by outlining the cookies used on the ESO public websites, their functions, the options you have for controlling them, and the ways you can contact us for additional details.
What are cookies?
Cookies are small pieces of data stored on your device by websites you visit. They serve various purposes, such as remembering login credentials and preferences and enhance your browsing experience.
Categories of cookies we use
Essential cookies (always active): These cookies are strictly necessary for the proper functioning of our website. Without these cookies, the website cannot operate correctly, and certain services, such as logging in or accessing secure areas, may not be available; because they are essential for the website’s operation, they cannot be disabled.
Functional Cookies: These cookies enhance your browsing experience by enabling additional features and personalization, such as remembering your preferences and settings. While not strictly necessary for the website to function, they improve usability and convenience; these cookies are only placed if you provide your consent.
Analytics cookies: These cookies collect information about how visitors interact with our website, such as which pages are visited most often and how users navigate the site. This data helps us improve website performance, optimize content, and enhance the user experience; these cookies are only placed if you provide your consent. We use the following analytics cookies.
Matomo Cookies:
This website uses Matomo (formerly Piwik), an open source software which enables the statistical analysis of website visits. Matomo uses cookies (text files) which are saved on your computer and which allow us to analyze how you use our website. The website user information generated by the cookies will only be saved on the servers of our IT Department. We use this information to analyze www.eso.org visits and to prepare reports on website activities. These data will not be disclosed to third parties.
On behalf of ESO, Matomo will use this information for the purpose of evaluating your use of the website, compiling reports on website activity and providing other services relating to website activity and internet usage.
Matomo cookies settings:
Additional Third-party cookies on ESO websites: some of our pages display content from external providers, e.g. YouTube.
Such third-party services are outside of ESO control and may, at any time, change their terms of service, use of cookies, etc.
YouTube: Some videos on the ESO website are embedded from ESO’s official YouTube channel. We have enabled YouTube’s privacy-enhanced mode, meaning that no cookies are set unless the user actively clicks on the video to play it. Additionally, in this mode, YouTube does not store any personally identifiable cookie data for embedded video playbacks. For more details, please refer to YouTube’s embedding videos information page.
Cookies can also be classified based on the following elements.
Regarding the domain, there are:
- First-party cookies, set by the website you are currently visiting. They are stored by the same domain that you are browsing and are used to enhance your experience on that site;
- Third-party cookies, set by a domain other than the one you are currently visiting.
As for their duration, cookies can be:
- Browser-session cookies, which are deleted when the user closes the browser;
- Stored cookies, which stay on the user's device for a predetermined period of time.
How to manage cookies
Cookie settings: You can modify your cookie choices for the ESO webpages at any time by clicking on the link Cookie settings at the bottom of any page.
In your browser: If you wish to delete cookies or instruct your browser to delete or block cookies by default, please visit the help pages of your browser:
Please be aware that if you delete or decline cookies, certain functionalities of our website may be not be available and your browsing experience may be affected.
You can set most browsers to prevent any cookies being placed on your device, but you may then have to manually adjust some preferences every time you visit a site/page. And some services and functionalities may not work properly at all (e.g. profile logging-in, shop check out).
Updates to the ESO Cookies Policy
The ESO Cookies Policy may be subject to future updates, which will be made available on this page.
Additional information
For any queries related to cookies, please contact: pdprATesoDOTorg.
As ESO public webpages are managed by our Department of Communication, your questions will be dealt with the support of the said Department.

