Getting Started
This section will guide the ICS software developer in creating a working project using a provided coockiecutter template. For getting the template from GitLab, see the Installation)
The user will be able to start the software components with the specific configuration prepared as a showcase for instrument developers. More details for each of the components will be given in the respective user manuals.
Updating an existing Project Configuration
If a version of your instrument project already exists, it is recommended to start from scratch following the instructions below and update your specific configuration in the new template afterwords. This approach might be better because of the possible changes in the template configuration and in the IFW components. If you have problems doing this, please contact ESO to get help doing this migration.
Creating a Project Configuration
The IFW includes a project template that can be used to generate the initial package of an instrument. The generated project can be considered as a mini template instrument that could be used as starting point for the development of the control software. It is still basic but the idea is to develop it further in future versions according to the progress of the framework components.
The generated directory contains a fully working waf project with the instrument directory structure, some configuration files and some custom subsystem samples, e.g. an FCS including a special device. In this example we will use “micado” as an example instrument. After executing the cookiecutter command with the provided template, the system will request the user input to enter the information for the generation of the configuration and customized code. This template also generates the code for a special FCF device that in this case we will name as “mirror”. The ‘component_name’ is referring to an instance of FCS.
> cookiecutter ifw-template/project
project_name [myproject]: micado
project_description [this is my project description]:
project_prefix: [xxx]: mic
component_name [mycomponent]: fcs
device_name [mydevice]: mirror
The generated directory structure including the first two levels is shown below. In this case, the directory mic-ics is a waf project that can be built. The resource directory is meant for storing the instrument resources like configuration files.
micado                  # Instrument repository
├── mic-ics             # Valid waf project
│   ├── build
│   ├── fcs             # Custom FCF instance
│   ├── micstoo         # Startup/Shutdown sequencer scripts
│   ├── seq             # Sample template implementation.
│   └── wscript
└── mic-resource        # Instrument resource directory
    ├── config          # Configuration files
    ├── nomad           # Nomad job files
    └── seq             # Sample OB
After the new directory is created, one could build and install the generated software.
cd micado/mic-ics
waf configure
waf build install
Update CFGPATH environment variable
If not already done, the CFGPATH environment variable shall be updated in the LMOD configuration to include
the template resource directory.
Add the following line to the modulefiles/private.lua file.
prepend_path("CFGPATH","<path_to_template>/micado/mic-resource")
Note
The above setting is needed for the proper functioning of CCF. Make sure the setting is correct before starting nomad.
Starting/Stopping the ICS Software
The IFW adopted experimentally Nomad (see here) to manage the life cycle of the ICS SW components following the recommendation from the ELT Control project. We are also using Consul, a complementary package providing service discovery that allow us to use names instead of using hostname/IPs and port numbers. A good introduction to these packages can be found here:
The project template includes the Nomad job configuration to start-up/shutdown the ICS components that are generated by the coockiecutter template. We are also proving a Startup/Shutdown Sequencer script that uses the Nomad jobs to start/stop the complete ICS SW resembling the osfStartup tool in the VLT.
Before describing the startup/shutdown sequence, a quick introduction to Nomad/Consul will be given to familiarize the reader with these new tools introduced in version 3.0.
Introduction to Nomad/Consul
Basic Configuration and Assumptions
We are still learning how to use in the most efficient way Nomad/Consul. For this version, we have provided a experimental configuration based on some assumptions that are documented hereafter. More complex configurations and deployments is of course possible but that it is left to each system. The idea of the template is to show the concept by providing a simple and representative example that can be easily extended.
One Nomad data center is foreseen for the complete instrument. Here we use the default one ‘dc1’
The Nomad configuration foresees running one Nomad Server and one Nomad Client in one node, e.g. the IWS.
Jobs are all deployed locally in the IWS.
Nomad and Consul shall be running as systemd services in the machine under the user eltdev.
We use raw_exec as the driver to run each of the jobs.
We have not used Nomad for GUIs
Ports are assigned randomly by Nomad.
We are using only a python library to query the consul service discovery.
We have used the Template Stanza for handling the automatic discovery of services in configuration files.
We are using signals to communicate changes of port numbers at run-time.
Nomad Jobs
The job configuration files uses the HashiCorp Configuration Language (HCL) to specify the details of each job. For more details about HCL can be found here.
A Nomad job configuration file is shown in the example below. This is the configuration for the DDT broker job included in the coockiecutter template. This file also contains the coockiecutter tags that will be used to customize it for each instrument.
job "{{cookiecutter.project_prefix}}broker" {
    datacenters = ["dc1"]

    group "{{cookiecutter.project_prefix}}broker_group" {
        network {
            port "broker" {} // use random port for broker
        }

        // register broker service in Consul
        service {
            name = "{{cookiecutter.project_prefix}}broker"
            port = "broker"
        }

        task "{{cookiecutter.project_prefix}}broker" {
            driver = "raw_exec"

            config {
                        command = "/bin/bash"
                args = ["-c", " ddtBroker --uri zpb.rr://*:${NOMAD_PORT_broker}/broker"]
                }
         }
     }
 }
Nomad GUI
The Nomad package includes a Web UI where to display the jobs and the Nomad Configuration. The Web UI runs on a browser under a http://localhost:4646. You can start firefox and connect to this page. For more details visit the following page:.
Consul Service Discovery
Consul is a tool for discovering and configuration services. We have used it to provide service discovery for our applications.
For servers, we are using the template Stanza to automatically retrieve the service information from configuration files. These templates files are rendered using the information provided by Consul when starting each Nomad job. The rendered files are saved in local directories managed by Nomad.
For scripts and GUIs, we use the Consul python client library (Python) to query the address and port of each service. For the command line, we provide a very simple utility (geturi) that will format a valid CII MAL URI to be used by other applications. This utility is using the consul python library internally to retrieve the address and the port from a given service name, see an example below.
> geturi fcs-req
zpb.rr://134.171.3.48:30043
> fcfClient `geturi fcs-req` GetStatus
Operational;Idle
In case the service is not available, you get an exception.
> geturi pippo
...
ValueError: ERROR: service not found in consul db: pippo
For python scripts, we provide a very simple utility class using the REST API of consul. See the example below. This class provides already the formatted URI that is used by the CII MAL clients.
import ifw.core.stooUtils.consul as consul_utils
import ifw.sup.syssup.clib.syssup_commands as sup

cons = consul_utils.ConsulClient()
""" Get formatted URI of Supervisor service """
uri = cons.get_uri("syssup-req")
""" Create instance of the Supervisor client """
supif = sup.SysSupCommands(uri, timeout=2000)
if not supif.is_operational():
    raise Exception('SW is not operational !')
Consul GUI
As for Nomad, Consul also provides a web based UI. You can use UI to display the active services that will be registered automatically when starting the Nomad jobs. The Web UI runs on a browser under a http://localhost:8500/ui. For more details visit the following page:.
Nomad Templates
In order to use the service discovery from Consul, we needed to adapt the configuration files to include the look-up of the service information. Nomad defines a way to do that in the job definition that it integrates with the consul template. When the job is started, the template is rendered and saved under the Nomad allocation directory. Then the processes uses the rendered files just like they normally do without Nomad. In this context, rendering means that we get the information from Consul to compose the URI, see the example below. This is a part of the content of a typical configuration.
req_endpoint    : "zpb.rr://{{ range service "fcs-req" }}{{ .Address }}:{{ .Port }}{{ end }}/"
pub_endpoint    : "zpb.ps://{{ range service "fcs-pub" }}{{ .Address }}:{{ .Port }}{{ end }}/"
Here the template does a query for a particular service in Consul and from the answer it gets the address and port. After the rendering process, the files are generated under <alloc>/<task>/local and the above contents are replaced by something like the following.
req_endpoint    : "zpb.rr://134.171.3.48:30043/"
pub_endpoint    : "zpb.ps://134.171.3.48:20054/"
Note
The ports numbers are unique and generated by Nomad.
How to start/stop a job from the command line
The sequencer can be used to start/stop all jobs. You could also select individual ones to stop/start if needed. There are dependencies between the jobs that need to be consider when starting them. The sequencer script defines the right sequence. However you can also use the Nomad CLI to start/stop each job from the command line.
As an example, you can see how to start/stop a given job from the command line:
Warning
Do not execute this command yet otherwise you will get an error.
> cd micado/mic-resource/nomad
> nomad job run fcs.nomad
==> Monitoring evaluation "f5d1514b"
    Evaluation triggered by job "fcs"
    Evaluation within deployment: "6aea79eb"
    Allocation "93945d7d" created: node "885603af", group "fcs_group"
    Evaluation status changed: "pending" -> "complete"
==> Evaluation "f5d1514b" finished with status "complete"
One could check the status of the job with the Web UI or with the following command:
> nomad status fcs
ID            = fcs
Name          = fcs
Submit Date   = 2021-03-25T13:31:15Z
Type          = service
Priority      = 50
Datacenters   = dc1
Namespace     = default
Status        = running
Periodic      = false
Parameterized = false

Summary
Task Group  Queued  Starting  Running  Failed  Complete  Lost
fcs_group   0       0         1        0       1         0

Latest Deployment
ID          = 6aea79eb
Status      = successful
Description = Deployment completed successfully

Deployed
Task Group  Desired  Placed  Healthy  Unhealthy  Progress Deadline
fcs_group   1        1       1        0          2021-03-25T13:41:25Z

Allocations
ID        Node ID   Task Group  Version  Desired  Status    Created     Modified
93945d7d  885603af  fcs_group   2        run      running   3m26s ago   3m16s ago
f7826c80  885603af  fcs_group   0        stop     complete  23h12m ago  3m35s ago
Stopping the FCS from the command line:
> nomad job stop fcs
Note
You can stop any job that is currently running with its name registered in Nomad.
Startup/Shutdown Contents
The project template comes with a predefined startup/shutdown script to start/stop a representative sample of ICS software processes. The list of processes is here:
DDT broker
CCF instance with Simulator and DDT publisher
FCF Simulators (shutter, lamp and motor)
Subsystem Simulators (subsim1, subsim2 and subsim3)
Custom FCF server instance with custom device (mirror).
Custom FCF simulator (mirror)
HLCC processes
OCM instance
DPM instance
System Supervisor
These components are obviously using simulators and not real hardware. The script shall be executed by the Sequencer.
Note
Since IFW version 5 beta, the sequencer does not use anymore Redis.
The script contains three main parts:
Stop all processes
Start all processes
Move all processes to Operational state.

Startup/Shutdown script in the Sequencer.
Executing Startup/Shutdown Script
Starting Sequencer GUI
In a terminal, type the following command to start the sequencer GUI.
> seqtool gui
Note
Since IFW version 5 beta, the sequencer binary has been renamed to seqtool. The sequencer starts automatically the server, so no need to start the server separately.
Running the Startup Script
Once the Sequencer GUI is running. Load the startup script (micado/mic-ics/micstoo/src/micstoo/startup.py) by selecting the Load Script option as shown in the following figure. It is assumed that the software has been already built and installed.
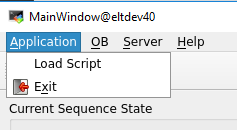
Load script option from Sequencer File menu.
To execute the script, just press the play icon at the top of the Sequencer GUI as it is shown in the next figure. At the end of the execution, all instrument jobs shall be running and the system should be in Operational state.
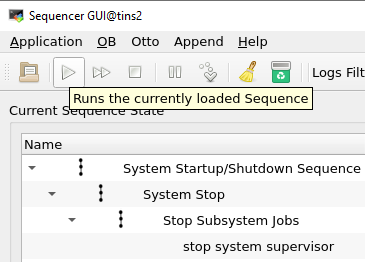
Load script option from Sequencer File menu.
A quick way to verify is to check the status of the Supervisor.
> supClient `geturi syssup-req` GetStatus
Operational;Idle
After a successful execution of the startup script, the nomad web UI can be used to verify the status the nomad jobs. A total of 15 jobs shall be running.
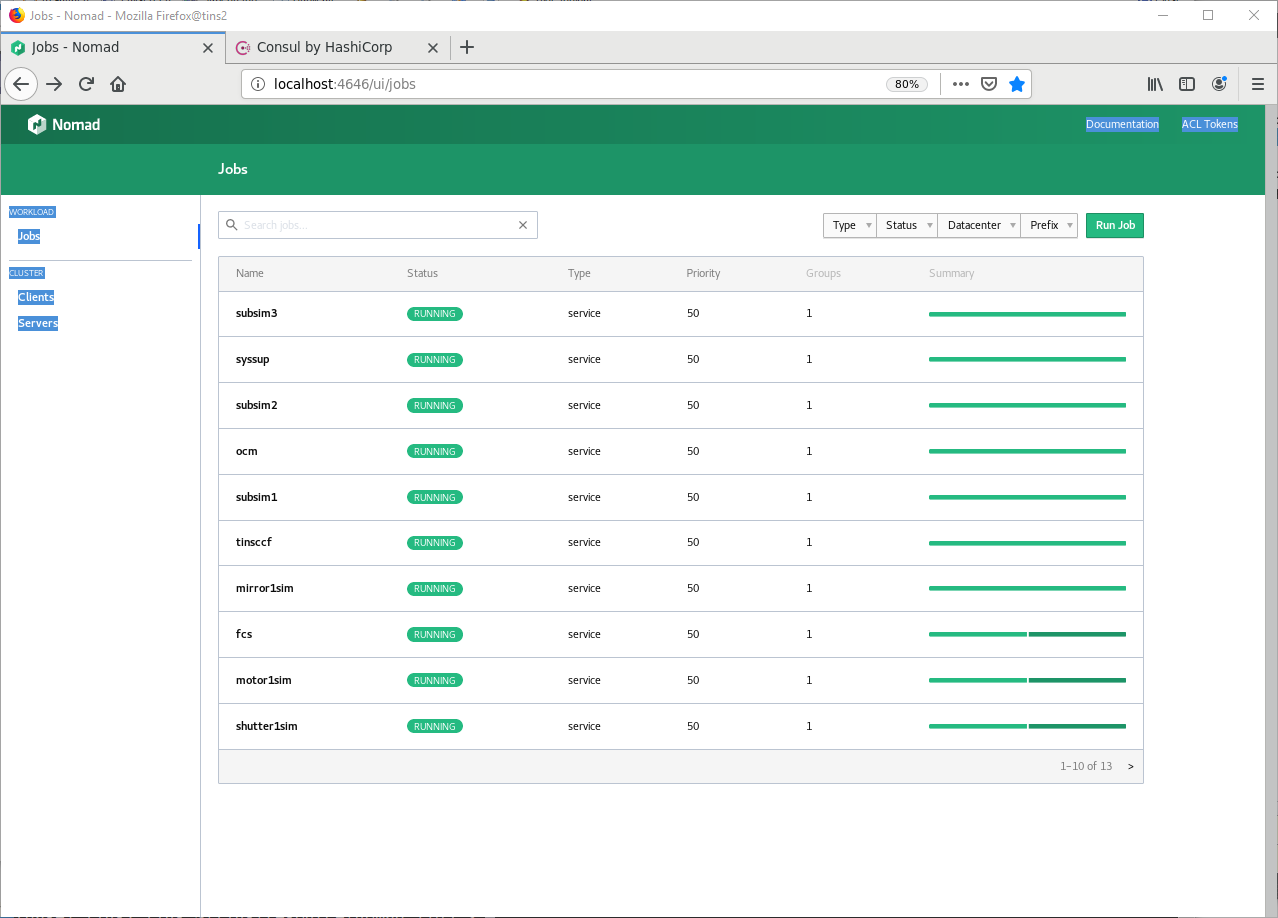
List of TINS Nomad Jobs.
The Consul UI can be used to verify the services registered. In this case the number of services is greater because in some cases there are two services defined per each Job.
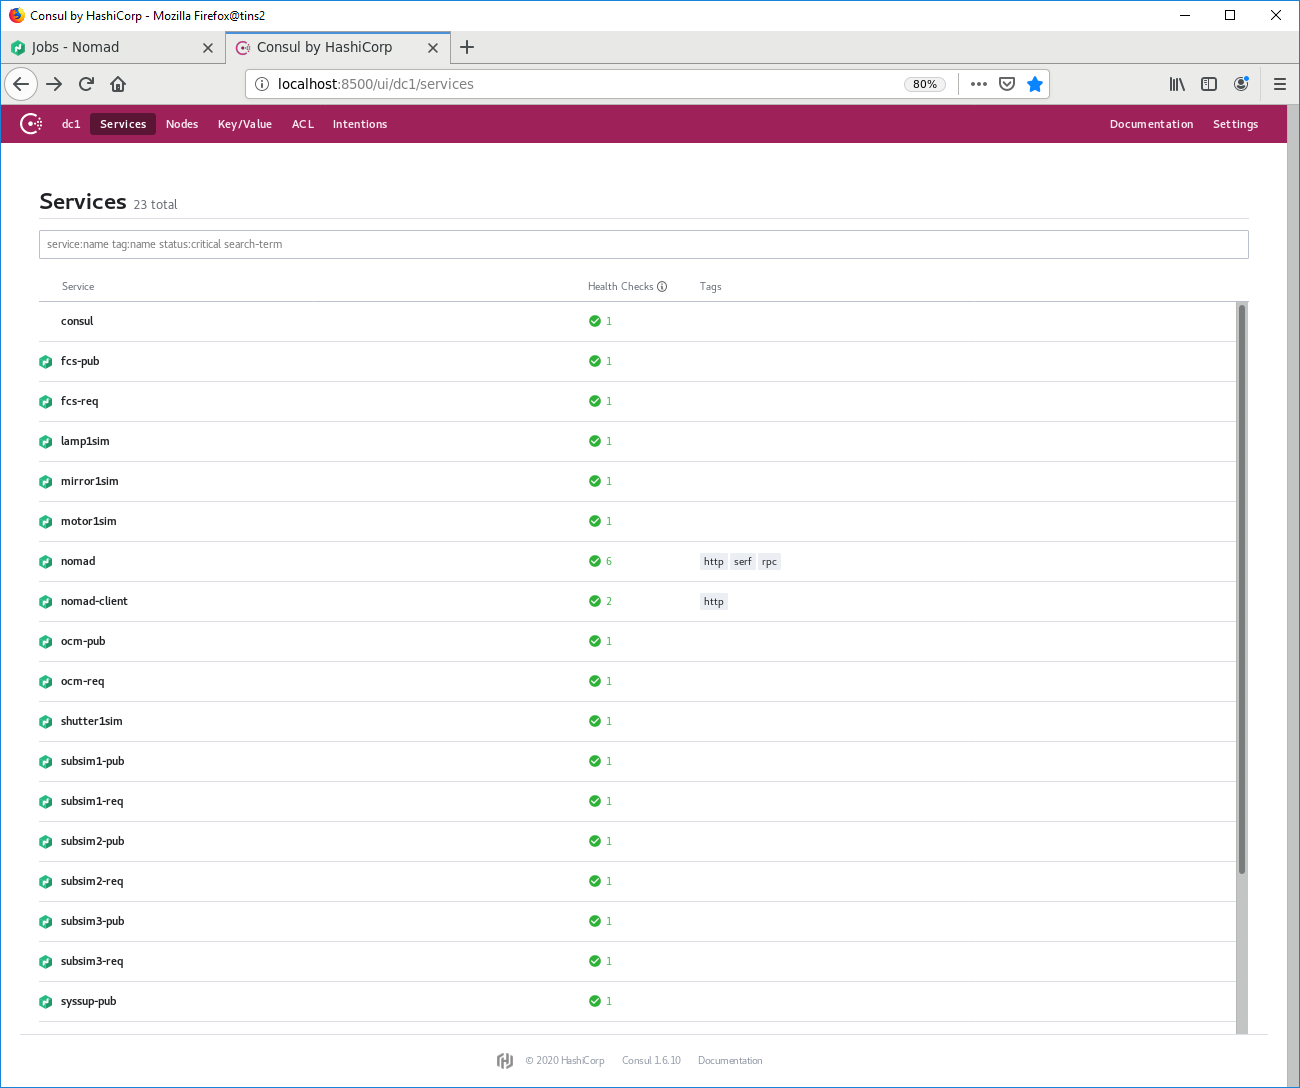
List of TINS Consul Services.
Note
As convention, we use <service>-req as the registered name in consul for the service request/reply port, e.g. fcs-req
As convention, we use <service>-pub as the registered name in consul for the service publish/subscribe port, e.g. fcs-pub
Troubleshooting
If all or some processes do not start, make sure of the following:
1. Check that Nomad/Consul have been started and are running correctly. Try using the Systemd commands to get status of the service, see below.
> systemctl status nomad
* nomad.service - Nomad
Loaded: loaded (/usr/lib/systemd/system/nomad.service; disabled; vendor preset: disabled)
Active: active (running) since Tue 2021-04-20 07:14:11 UTC; 3 weeks 0 days ago
 Docs: https://nomadproject.io/docs/
Main PID: 413992 (nomad)
    Tasks: 541
Memory: 969.4M
CGroup: /system.slice/nomad.service
       ├─ 413992 /opt/nomad/bin/nomad agent -config /opt/nomad/etc/nomad.d
       ├─2864103 /opt/nomad/bin/nomad logmon
       ...
2. If you run the startup/shutdown script under a different user than eltdev, make sure that Nomad (running under eltdev) can read the template files. These files are read by Nomad during the rendering process. If your problems persists try to run the startup/shutdown script under the eltdev account.
3. Make sure eltdev user has properly defined its environment. All environment variables shall be defined under eltdev since it is at the end the user that runs the processes through Nomad.
4. Stop Nomad and Consul and run them manually outside the Systemd to get all logs and see the possible cause of the issues.
Validating the Software with a sample OB
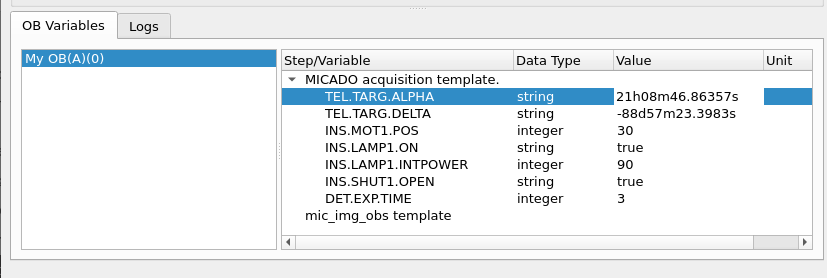
We have prepared a very basic OB with an acquisition and observation template. The acquisition template prepares FCS, the camera system and the telescope simulator for the upcoming observation template that takes an image with the camera control system.
Note
The interaction between the Sequencer and the components is through the python client libraries provided by each component.
Before to start, the current script loaded in the Sequencer GUI must be cleared by pressing the reset button (trash icon).

Clear the current script and reset the server.
Then, the OB shall be loaded by pressing the open button as shown in the next figure. The path of the sample OB is: micado/mic-resource/seq/tec/MICADO_OB_sample.json.
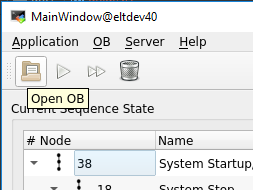
Load an OB.
To run the template, just press the play icon at the top of the Sequencer GUI.
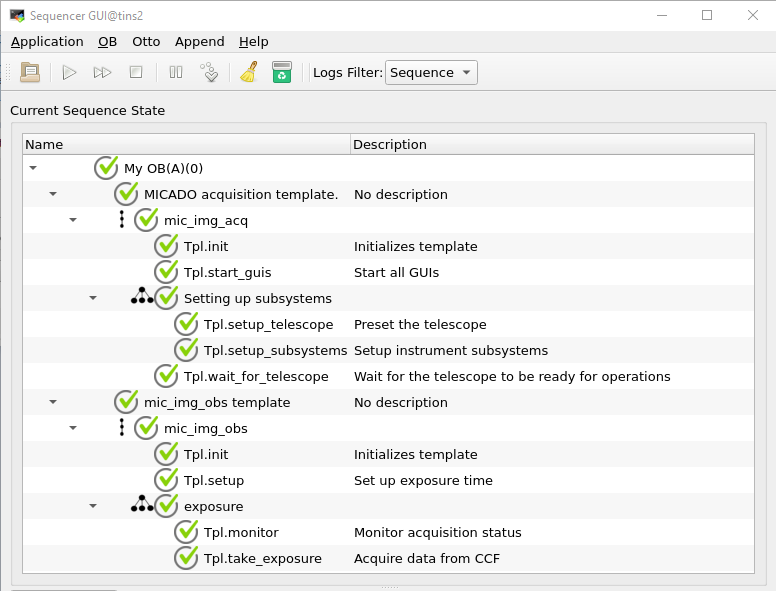
Sample OB.
At the end of the execution, the image acquired by CCF shall be displayed in the DDT Viewer that it started by the template.
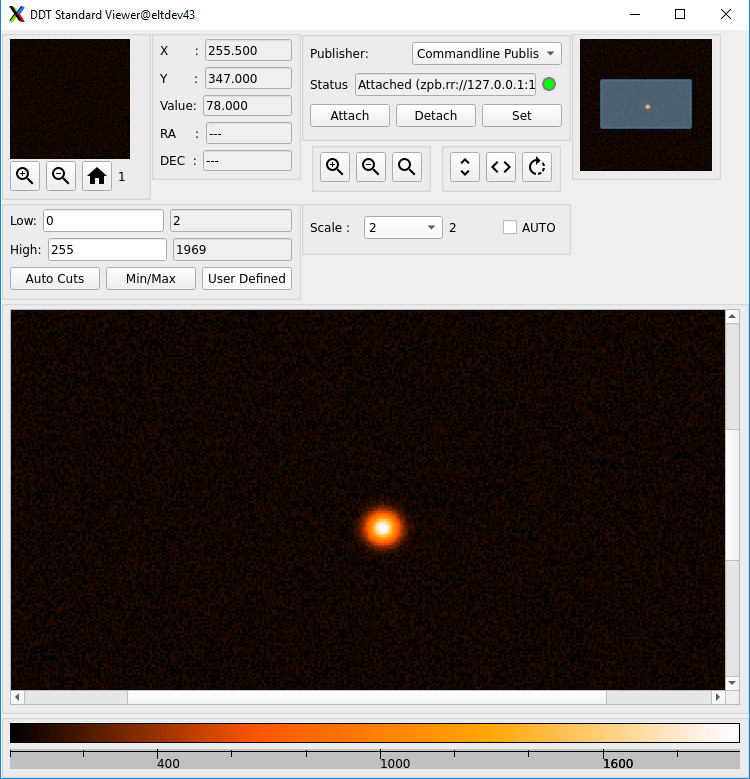
DDT Viewer with image received from CCF.
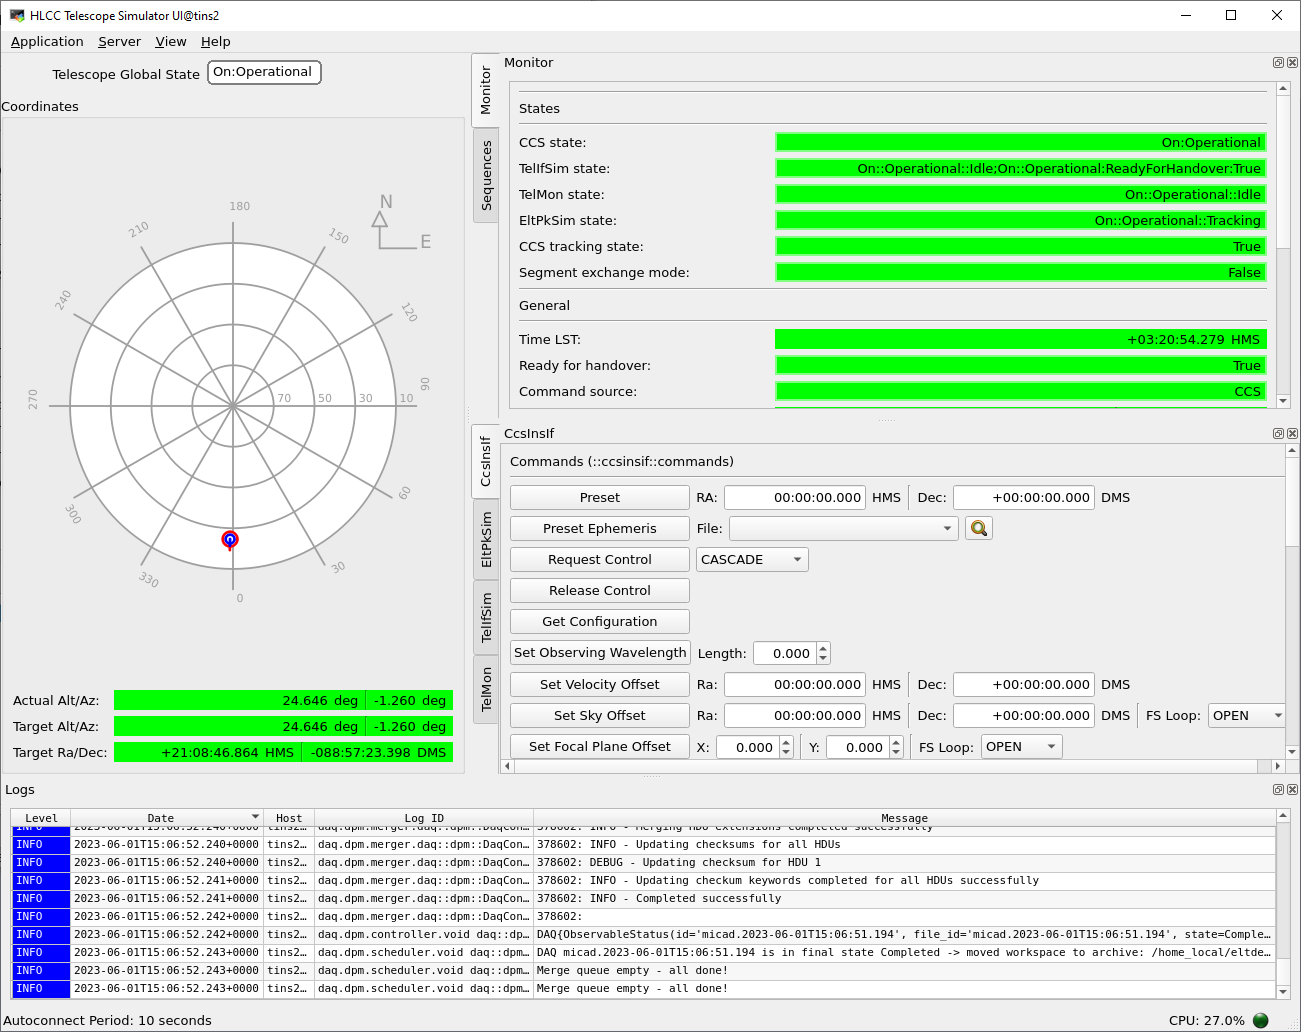
THe OB also launches the CCS telescope simulator GUI.
You can verify in this GUI that the telescope simulator is pointing to the right coordinates. You could change the OB parameters from the sequencer GUI and execute the OB again validating the new values are correctly received by the telescope simulator.
Note
For simplicity, we are currently only sending alpha and delta parameters.
The resulting FITS file generated by DPM is located under $DATAROOT/dpm/result.
Congratulations that you reached the end of the general Getting Started section. Further instructions you may find in the specific documentation of the components.
Updating Sample Configuration
To update the default configuration of the template, developers can modify the configuration files that are located under the resource directory, e.g. under resource/nomad.
