
VIRCAM p2 tutorial
This tutorial provides a step-by-step example of the preparation of a set of OBs with VIRCAM at the VISTA survey telescope.
To follow this tutorial you should be familiar with p2: the web-based tool for the preparation of Phase 2 materials. Please refer to the main p2 webpage (and the items in the menu bar on the left of that page) for a general overview of p2 and generic instructions on the preparation of Observing Blocks (OB). Screenshots for this tutorial were made using the demo mode of p2, but should not differ in any way from one's experience in preparing your own OBs under your run.
0: Goal of the Run
In this tutorial we will prepare OBs for a simple example observing run, consisting of 2x2deg mosaic observation around the target centered on RA=05:30:40.00; Dec=-30:34:44.00. The tutorial is mostly focused on how to import a pointing positions xml file created with the Survey Area Definition Tool (SADT). The following movie shows how to create such a survey area.
1: Getting Started
The Phase 2 process begins when you receive a communication of the ESO Observing Programmes Office (OPO) communicating to you that the allocation of time for the coming period has finalized and that the results can be consulted in the corresponding Web page. You follow the instructions given by ESO and find that time was allocated to your run with VIRCAM. Therefore, you decide to start preparing your Phase 2 material.
First, please familiarize the necessary documentation:
- the VIRCAM User and Template Manual
- The documentation on the help section about p2 referred to above.
- Summary of the p2 tool including information how to organize observations in group, concatenation or time-link containers if necessary
- SADT Cookbook: ESO Manual for SADT
2: Creating a template OB
For this tutorial we use the p2 demo facility: https://www.eso.org/p2demo
This is a special facility that ESO has set up so that users who do not have an approved observing run can still use p2 and prepare example OBs (for example, while writing a proposal to get the overheads right!). Since demo database is different from the operational one, the OBs prepared in p2 demo cannot be used for execution. To prepare OBs for observation you should use your ESO User Portal credentials for p2 (with http://www.eso.org/p2).
Start by selecting the run on the left and after clicking on the (+) symbol next to run, expand it then select a folder. Within a folder (expanded by clicking again on (+) symbol) add an OB by clicking on the blue OB button below. This will add a new OB. After selecting it, you can add the first acquisition template. For typical survey observations where a contiguous area should be mapped the appropriate acquisition template is VIRCAM_img_acq_tile.
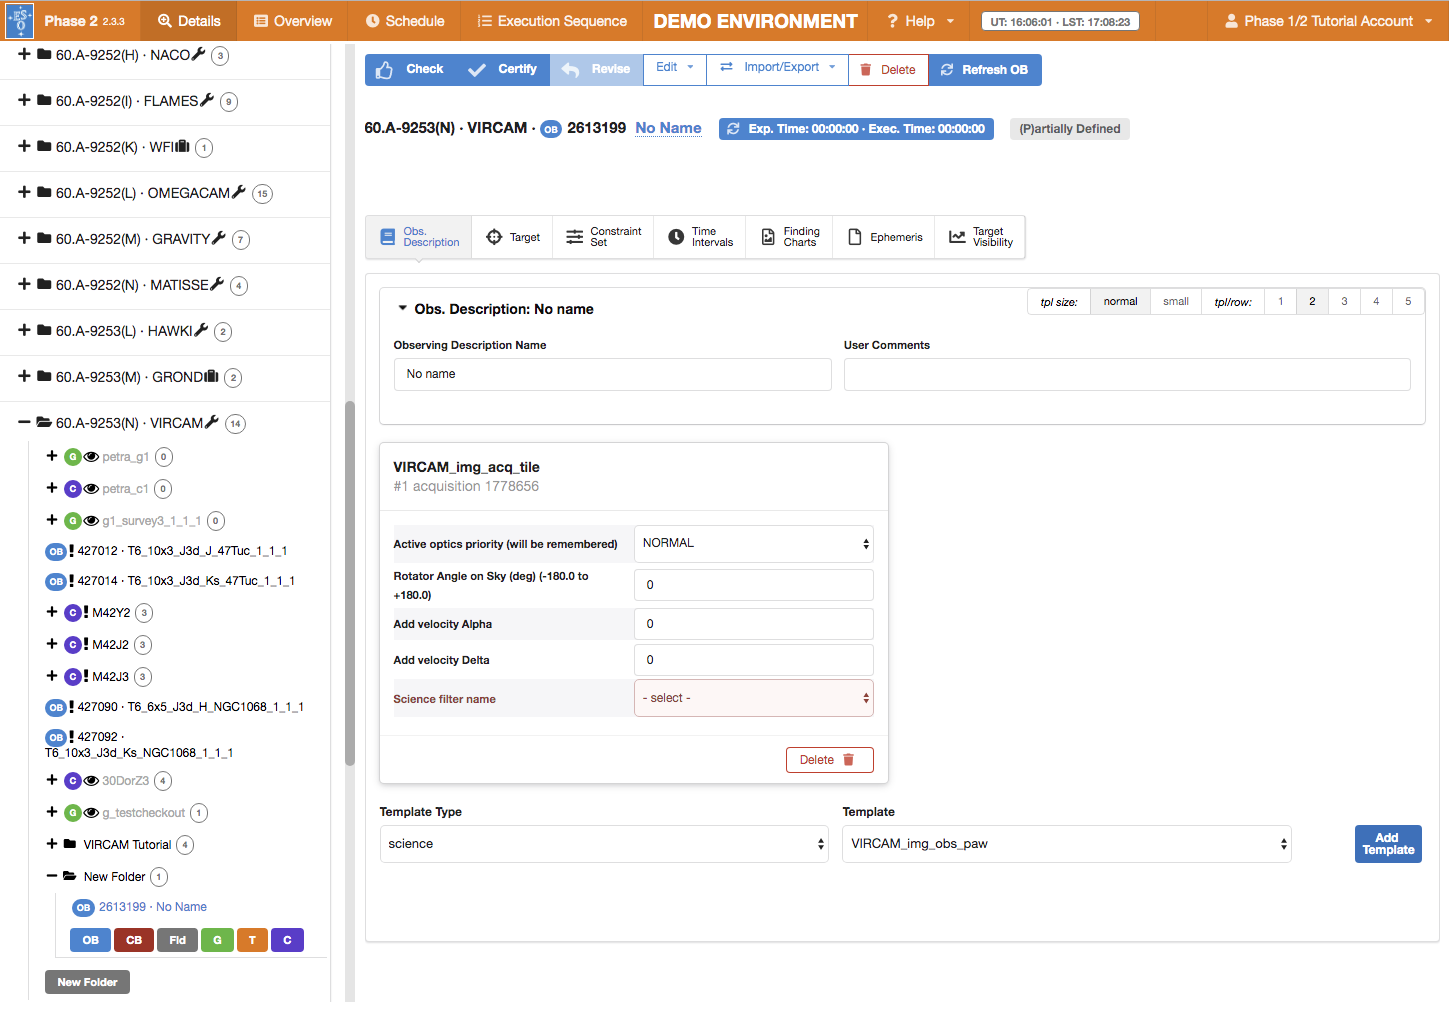
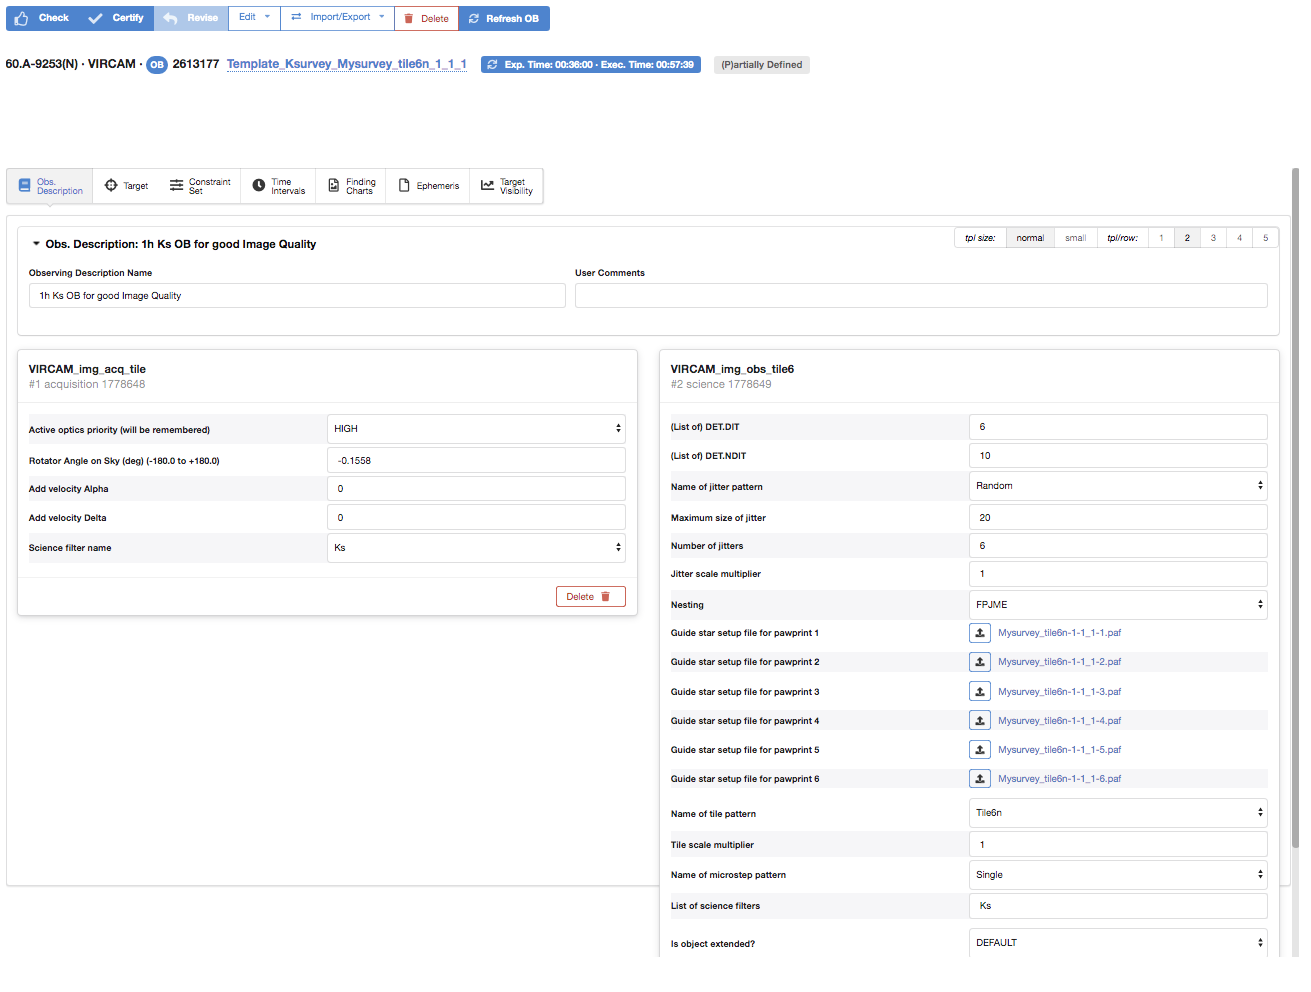
Now edit the "Science filter name" parameter in the acquisition template to Ks - this is the filter we will use for observations.
We are now ready to add a science template: select VIRCAM_img_obs_tile6 from the template menu below the acquisition template. In the science template we will add DET.DIT = 6 (this is the Detector Exposure Time) and DET.NDIT = 10 (this is the number of DITs that are summed up before the image is written). Each image will have DIT x NDIT = 60 sec. After each 60 sec, we will have a small offset according to a Random jitter pattern and with jitter offset up to 20 arcsec. We leave the Jitter scale multiplier to default value of 1 and the Nesting at "FPMJE". Please see the VIRCAM User Manual for a complete description of different jitter patterns and tile patterns. We also need to select the list of science filters. In this case we will only use Ks. It is not necessary to change here the tile pattern, because it will be overwritten after importing survey area according to the tile pattern selected in the SADT.
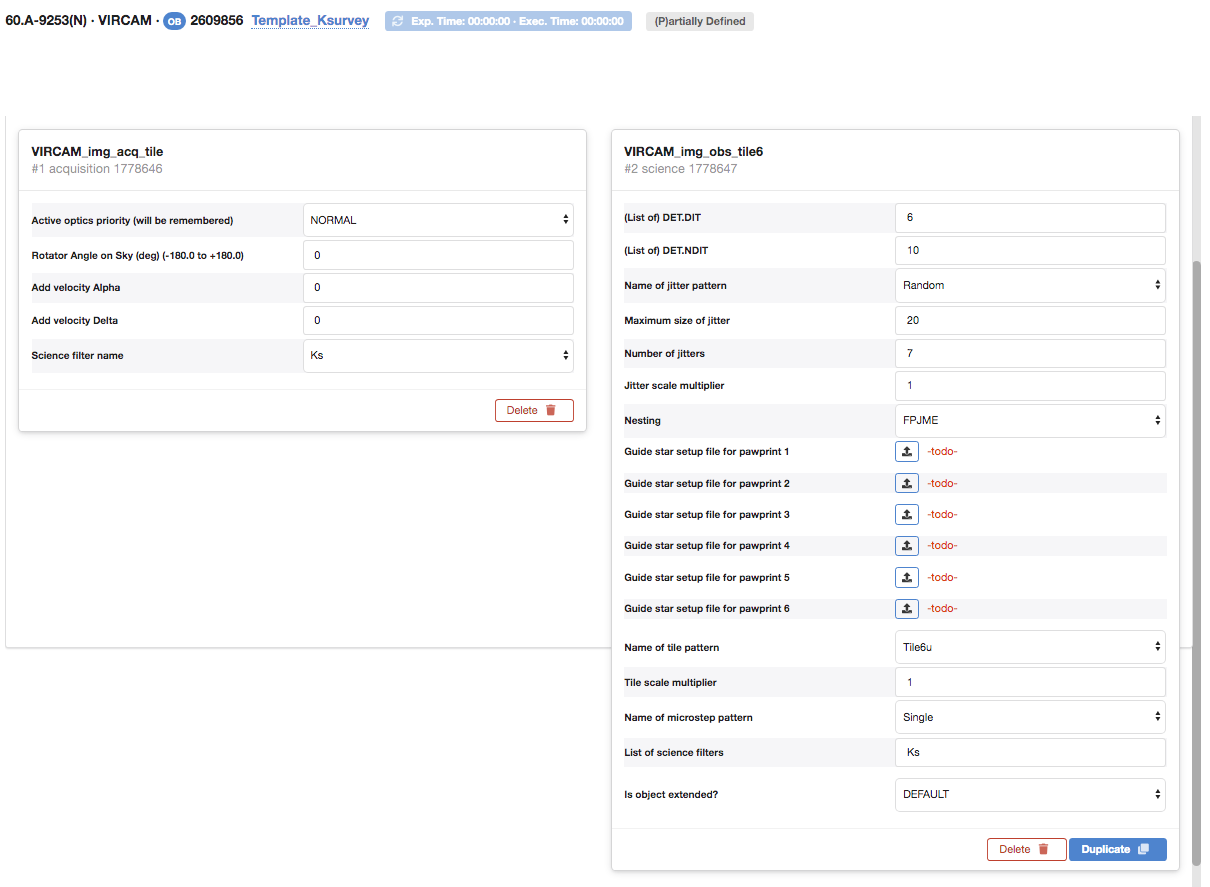
We have also changed the OB name by clicking on the "No name" and after typing Template_Ksurvey we save it by pressing return key. In the Target tab set the target name to an appropriate value (otherwise it will be No name for all OBs).
3: Setting the Constraint Set
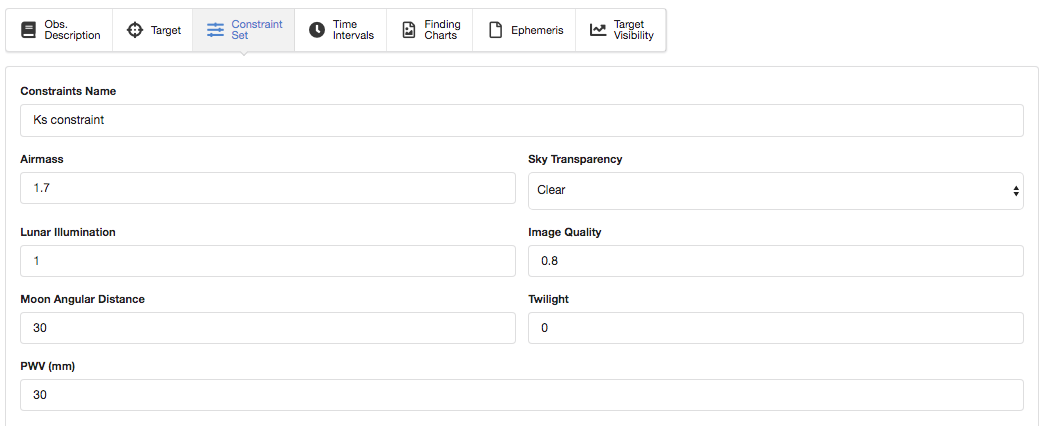
We decide to change the constraint set to ensure that we can get the very good image quality (0.8" or better).
Note: if we had several template OBs (e.g. for different filters) it would be possible to update the constraint set by copy/paste from one OB to another (using copy/paste under Edit menu on top). For (nearly final) VIRCAM OBs that have already filled survey area (have attached PAF files - see below) be careful NOT to copy/paste Observation Description from one OB to next, because that will copy also PAF files that will not any more correspond to correct target coordinates.
4: Importing Survey Area XML file to create final OBs
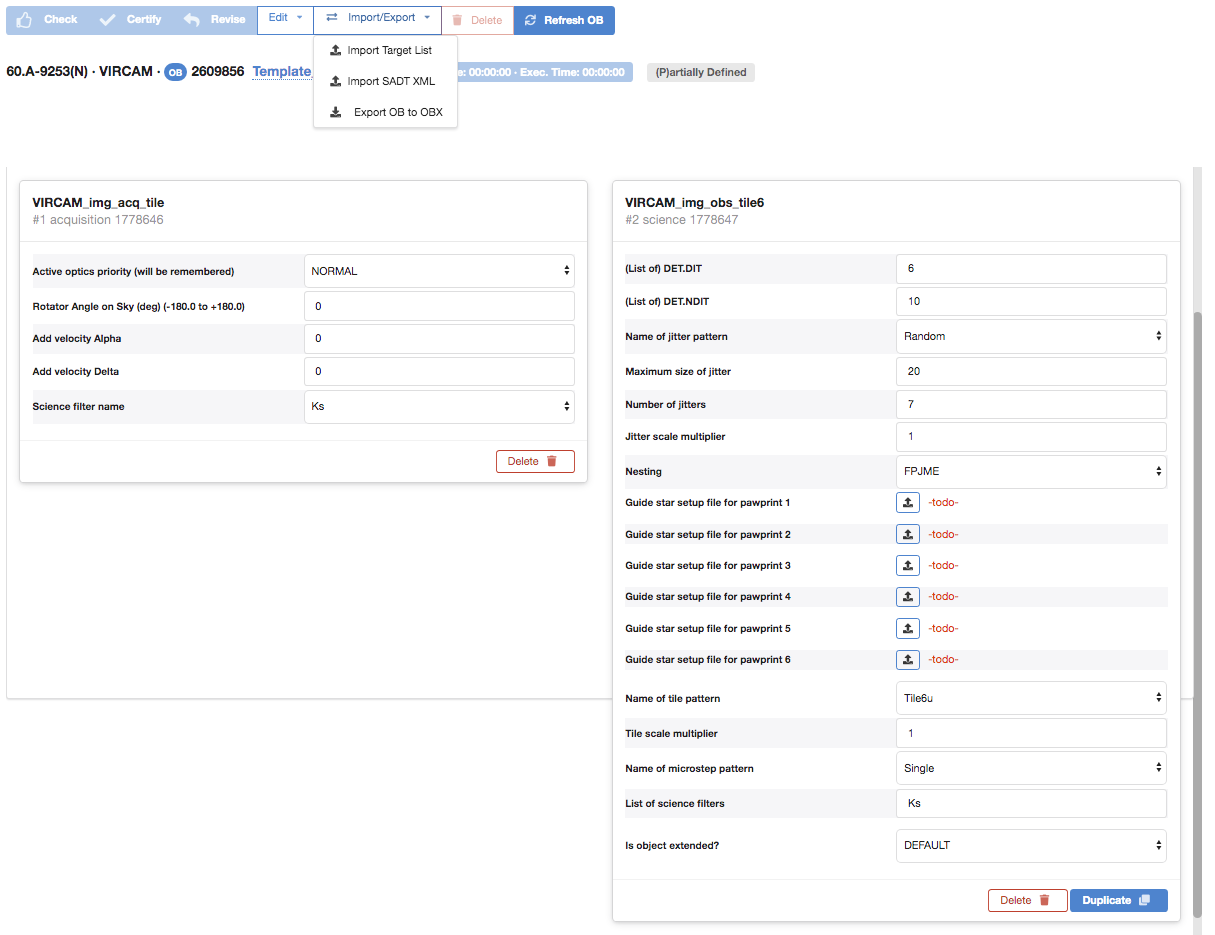
Now select Import SADT XML from the Import/Export menu on the top.
After importing the survey area, our template OB was duplicated 4 times (because the SADT xml file had 2 x 2 tiles), the tile pattern was updated to Tile6n, and the appropriate PAF files were attached to each of the pawprint science template keywords. These PAF files contain coordinates of guide and active optics stars selected by the SADT. The target coordinates have also been updated.
To check if all the OB is valid, press the Check button - here we note an error: the Active optics priority (AO priority) keyword in the acquisition was set to NORMAL (default), but it should be HIGH because in our example we want to achieve very good image quality (0.8"). Also, the OB was lasting more than 1h - to decrease the OB length we change the number of jitters to 6.
The final set of VIRCAM Example OBs created in this tutorial are located under p2 Demo VIRCAM Tutorial folder.
5: Finishing the preparation and submitting the OBs
Another view of the observing run structure is the Schedule view. In the very top menu click on the tab Schedule. In this view you can assign priorities to the containers or single OBs by setting numbers between 1 and 10. The lower the number the higher the priority of the OB or group.
A general overview of the prepared OBs is given by selecting the Overview button in the very top menu.
With the completion of the OBs, we consider the example developed in this tutorial to be finished.
However, for a real Service Mode Run, you will have to perform some additional steps. You would also make sure to:
- click the "Check" button (to the right of the Exec. Time button) for each OB. This will run consistency checks on the selected OB(s).
- click on the "Certify" button (to the right of the Check button). Certify does the same as Check, but additionally (if the check was successful) marks the OB(s) as fully compliant and ready for ESO's review. It also marks the OB(s) as read-only. If OBs are organised in scheduling containers select the container (group, concatenation, time-link) to run Check or Certify action.
- (optionally) select one or more certified OBs and click on the "Revise" button (to the right of the Certify button) to revoke the certified status and allow re-editing. If this is done it steps 1 and 2 above should be re-done for the OB(s) and scheduling containers in question.
- complete the information in the README file
- select the run folder and click on the "Notify ESO" button (to the right of the Revise button). This will lock all certified OBs (and containers) as well as the README, in preparation for ESO's Phase 2 review process.
These steps are also explained in more detail on our p2 webpage.
As mentioned above, all users have access to the p2 demo facility. And, unlike the situation that existed with p2's predecessor, P2PP3, all OBs are created directly on the ESO database (there is no longer a "check-in" requirement). Hence, all users can see what you leave behind. Indeed, after a while, if not properly maintained, the p2 demo runs could and would get cluttered with all manner of OBs, containers, etc. Thus, as a courtesy to the next user who follows this tutorial, we would like to ask you to finish these exercises by deleting the OBs, containers, etc. that you make.
Finally, please note that when looking at the tutorial run in the p2 demo facility you will see that both OBs are marked as (+) Accepted. This is a state that these OBs have been set in (by ESO) solely to avoid them being inadvertently deleted from p2.